This behavior is so frustrating. We don’t live in a time where IMAP storage space is at a premium anymore! Fairmail saves a copy of sent mail in the IMAP’s ‘Sent’ folder by default.
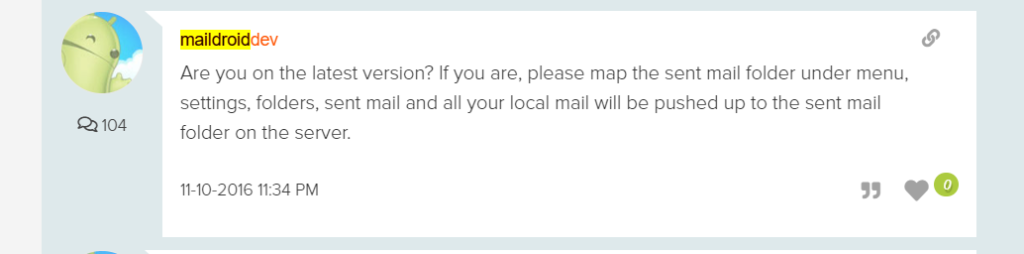
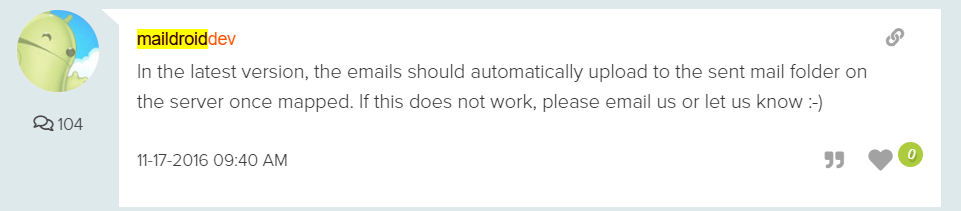
I did some research and it seems like MailDroid insists on ‘saving the sent mail in “Sent from device” folder (I tried disabling it thinking Maildroid will be smart enough to save it in the IMAP’s sent folder, but no, it doesn’t).
Fairmail’s Settings->Send->Message->[Last Item] On Replying to a message in user folder, save the reply in the same folder was disabled (should be, or else it’d be messy), but there’s a subtext that says “The email server could still add the message to the sent message folder”, which points me to think saving a copy to the Sent folder is an IMAP server managed behavior, so it doesn’t rely on email clients specifically telling it where (which folder) to save the sent email.
I was about to give up Maildroid and stick to Fairmail, and did a little research on “imap put sent mail in sent folder” and viola, Maildroid is the first one that came up. Seems like I wasn’t the only one perplexed by Maildroid’s weird design choices and it seems like most other email apps do not have this awkward behavior.
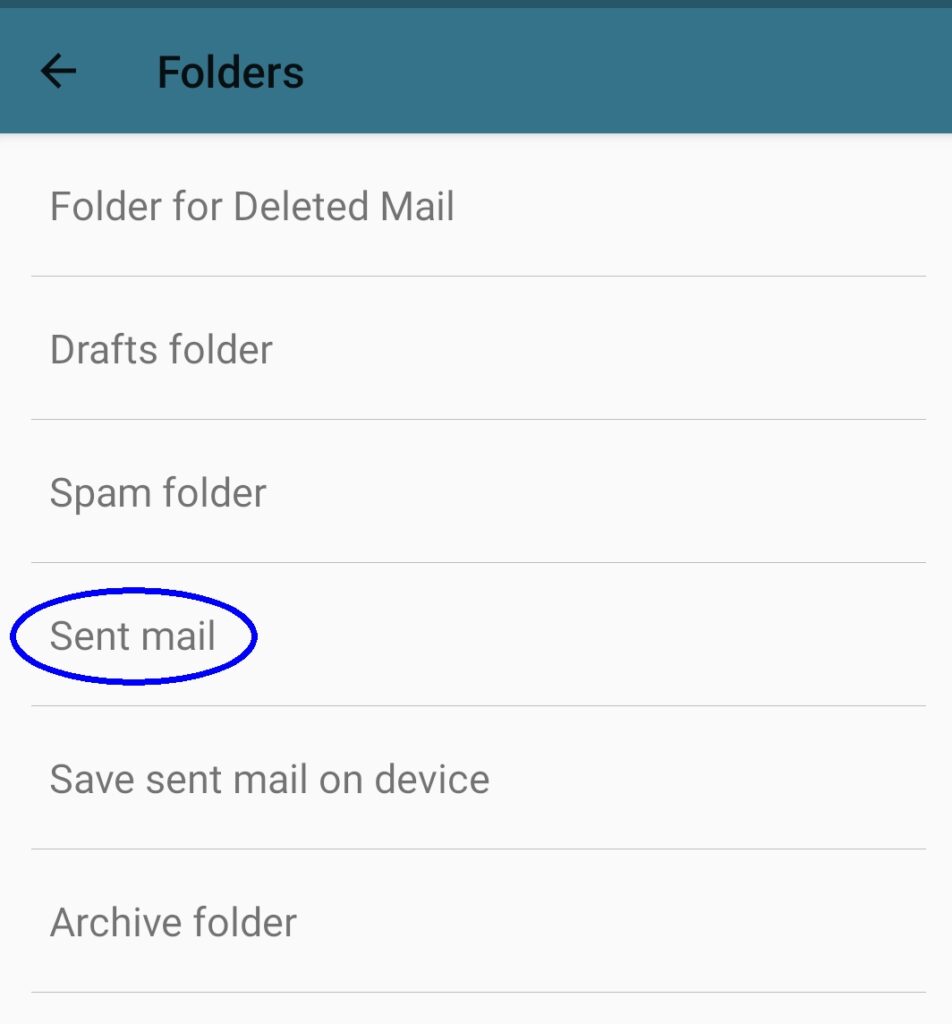
I did as what the dev for maildroid said and it turns out all of the email accounts in use says “Not specified”. When I clicked on one of the accounts, the root folder /Inbox shows up. I had to expand it with the ‘>‘ so the (IMAP) sub-folders show up.
This GUI was designed horribly and it’s clearly an afterthought. The reason I’m saying that instead of just assigning the IMAP sent folder right away after I tapped on it, the UI changes the text at the bottom of the screen (WTF) to what I’ve selected (despite there were no multiple choices) and expect me to click the DONE next to it. It’s so unintuitive in many levels.
I’ve been using CPIME for ages and I’m comfortable with Sidney Lau’s phonetic scheme. Jyutping is unnatural to Hongkongers because we do not consider ‘j’ a ‘y’ sound like Germans do.
However, since Windows 10, there aren’t much choices when it comes Cantonese IME that defaults to Sidney Lau’s and yet it accommodates common swearwords (including the most common ones that were technically incorrect) well. The only reasonable choice is Andrew Choi’s CAP, which I will write about how to get it working for Windows 10 on another blog post.
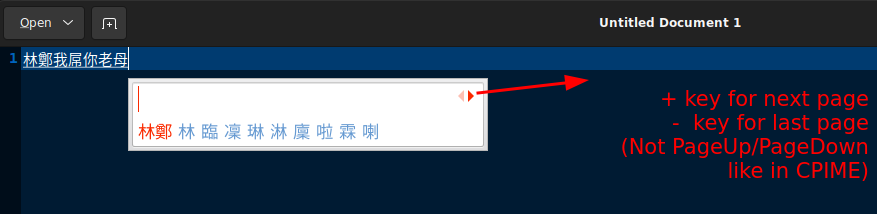
There aren’t much choices for Linux either. There’s RIME, but it’s super hard to install and Sidney Lau’s phonetic scheme is buried deep down that can only be changed with shortcut keys during the IME composition mode. The deal breaker is t.he lack of swearword support. Being able to type 林鄭我𨳒你老母 is essential for every self-respecting Cantonese speaker. 「屌」你老母 just won’t cut it. Lol.
CAP takes a quite bit of wrestling to get it to install in Windows (in another post) and quite a bit of wrestling to get it to function in Linux. Once you get it working, it’s a very powerful Cantonese IME that allows superfast typing unless you plan to play with words (玩食字). I just can’t praise the IME design enough and I was willing to deal with the quirks which curbs its wide adoption.
Andrew Choi made a few release at his blog page in 2012 (ibus), 2015 (ibus), 2018 (fcitx), 2019 (fcitx4) and 2021 (fcitx4). For the linux version, this blog post is only concerned with the 2021 version (latest at the time of writing).
For Linux CAP, installing the debian package is the easiest part:
sudo dpkg -i fcitx-cap_1.0.0_amd64.deb
The thorns are
get the CAP show up on the list of valid input methods
fend of fcitx5 which is trying to kill CAP
deal with IME settings state corruption (especially when working with other IME)
live with being unable to select characters from subsequent pages of selection candidates
CAP is not immediately available as an IME out of the box (even after installing the .deb package)
.
You will need to add Chinese to “Install / Remove Language” under “Language Support” to get anything to show up there!
Fend off fcitx5
fcitx5 was recently released and Ubuntu is aggressively trying to push it onto every user. However, its very existence kills the currently available CAP which is written for fcitx4 as of the 2021 release. This means you will have to give up fcitx5 if you want to use CAP!
Fcitx5 is considered as a replacement for fcitx4, so whenever Ubuntu sees that you have fcitx installed (which is likely fcitx4), it’ll tempt you into installing fcitx5. DO NOT ACCEPT THE INVITATION! However, fcitx5 do not coexist with fcitx4. Your fcitx4 will be removed the moment you installed fcitx4. To go back to fcitx4, you have first to remove fcitx5 completely then re-install fcitx.
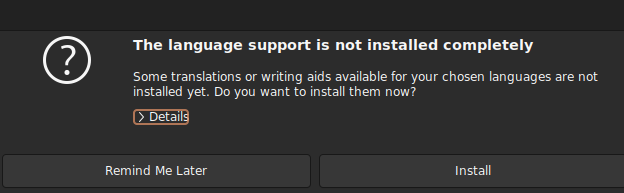
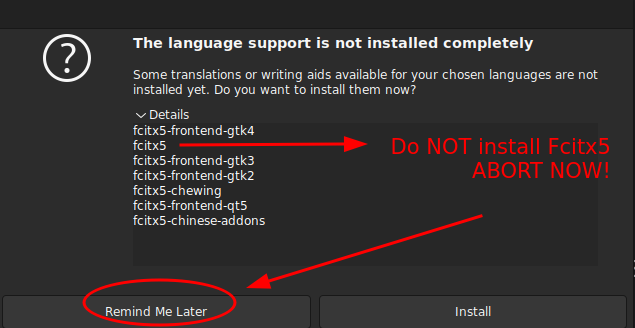
What makes things more complicated is that Ubuntu’s gnome Language Support GUI keeps prompting you to install fcitx5 whenever you start it or do something with it such as installing new languages (which is required as the first non-obvious step). It’ll typically try to deceive you into installing fcitx5 with a dialog box like this:
but if you open up the details it’s fcitx5 which will cockblock CAP
However, when you try to perform the first step, if you already have fcitx (fcitx4) installed, adding new languages (required to get CAP) to work will come bundled with upgrades to fcitx5! It’d be super frustrating. So you can choose between the two paths
1) Concede to fcitx5 and downgrade to fcitx4
install the languages first (with fcitx5 IMEs),
remove fcitx5
install fcitx4
2) Prevent fcitx5 in the first place
remove fcitx4,
install the languages (no fcitx IMEs)
install fcitx4
Remove fcitx4
sudo apt purge fcitx
Remove fcitx5
sudo apt purge fcitx5*
Install languages
If you already have fcitx installed (path #1), you’ll have to click yes and live with fcitx4 being upgraded to fcitx5 which you’ll have to destroy it later and reinstall fcitx4.
If you already removed fcitx, Language Support will only install IME for other systems such as ibus associated with installed languages
Install fcitx4 AND activate it
sudo apt install fcitx
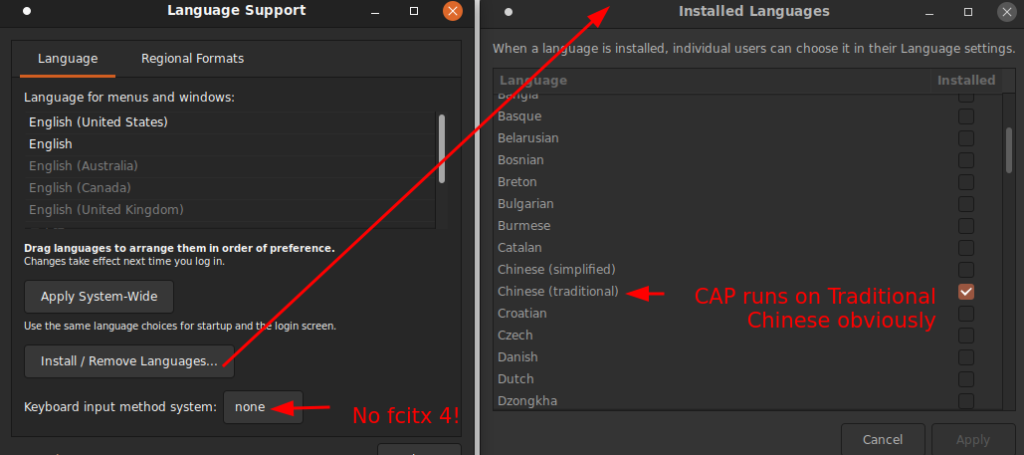
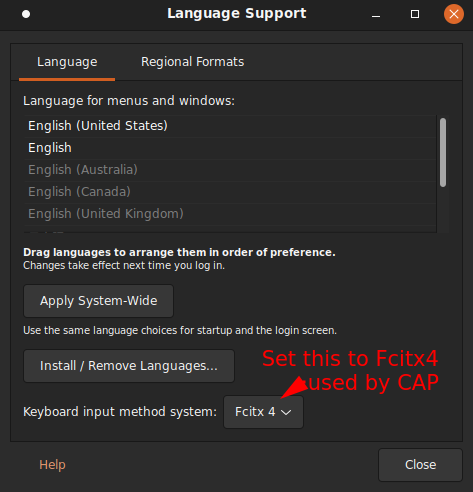
Remember to select the installed Fcitx 4 as your IME system (not ibus, etc, or none):
Now CAP is on the list of available IMEs in fcitx-configuration
Learn the new shortcut keys that are different from Windows
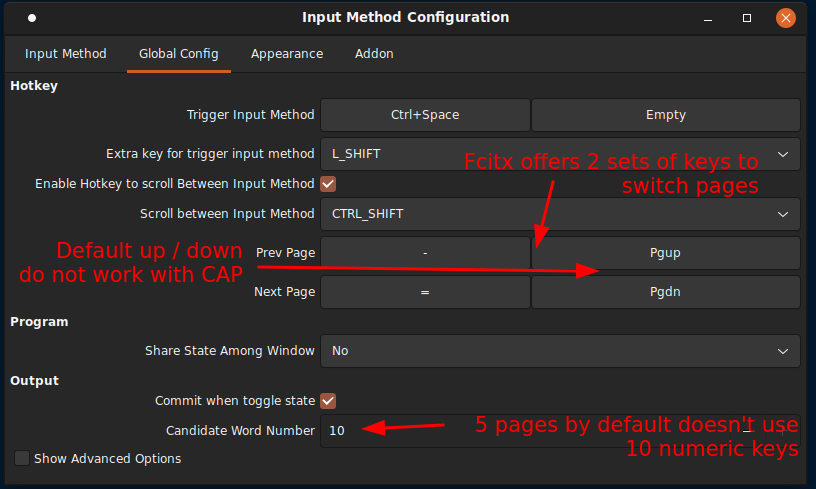
One default out of the box that’s hard to guess is moving from page to page. It used to be PageUp/PageDown but CAP follows fcitx’s global configuration moving between pages, which is the lower case of +/- keys which is basically =/- because + is upper case while it was intended to be lower case. I know, this is confusing!
IME switching follows the OLD windows shortcut keys (like Windows 98 and XP days), which
Ctrl+Space means turning IME on/off (global sense),
Ctrl+Shift changes IME languages (newer Windows use Alt+Shift by default)
Shift to temporarily disable/enable the IME (i.e. English mode) but stay within the language state
More customizations to get it closer to Windows IME behavior
CAP follows the global config settings in fcitx, unlike mozc (Japanese IME) which sometimes play by its own rules which behaves similar to its Windows’ counterpart.
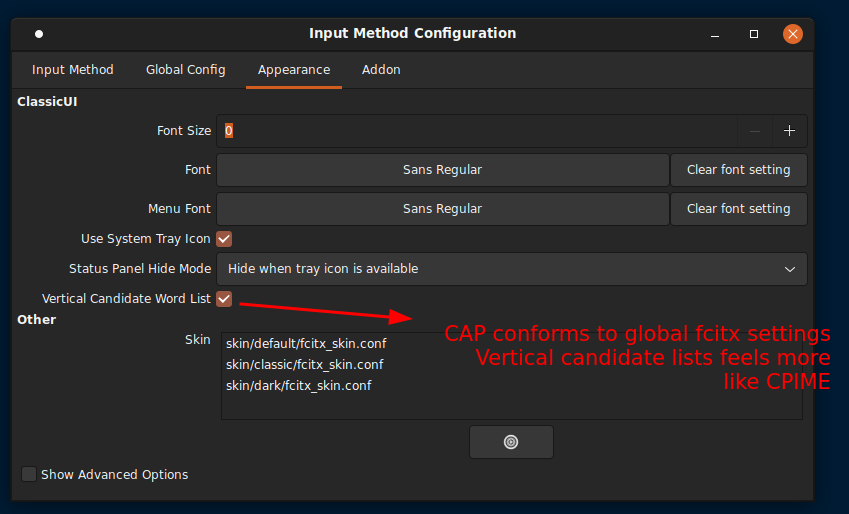
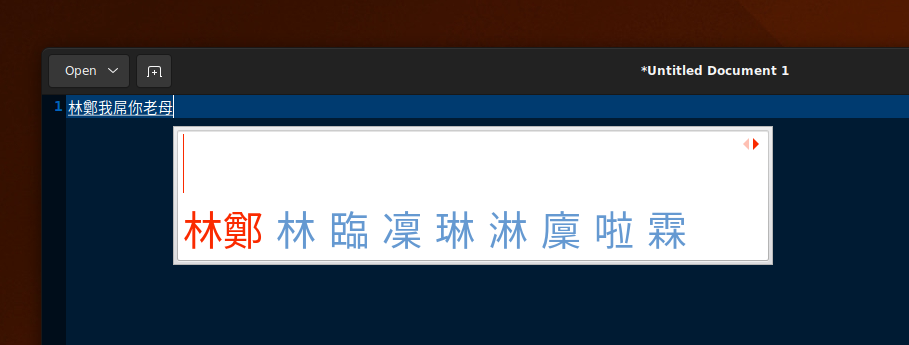
If you are used to CPIME’s vertical lists, you can change it in ‘Appearance’ tab.
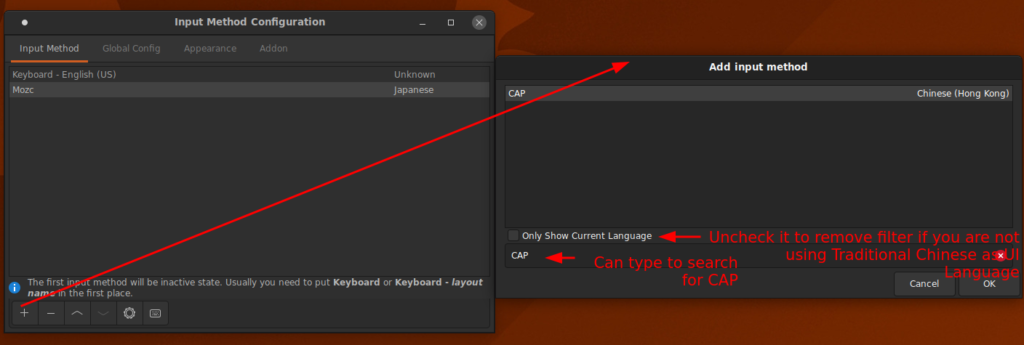
CAP candidate selection quirks when used with mozc (bug?)
For some reason, when both CAP and mozc are freshly installed, the first time you use the candidate list in mozc by selecting space/tab, the candidate list will disappear!
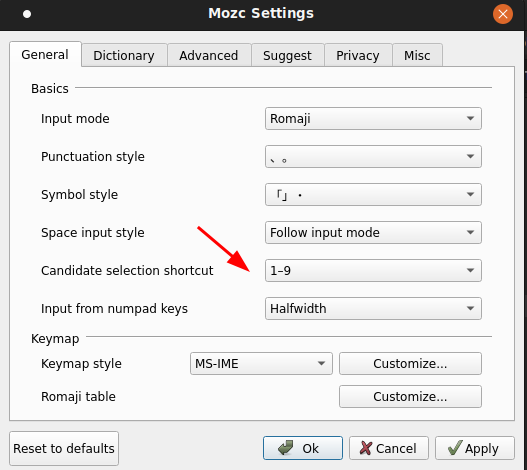
I installed and uninstalled fcitx, mozc and CAP and realized narrowed the bug to this reproducible path. My suspicion is that there’s a setting regarding the candidate selection shortcut (usually by ‘1’~’9’+’0′) parameter state that’s not exposed in fcitx-configuration that was being changed my mozc. And this guess puts me closer as I was able to play around with mozc’s config and found a candidate selection shortcut option
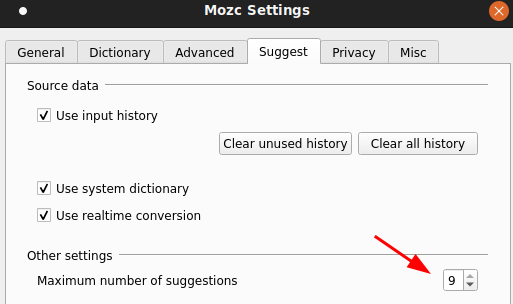
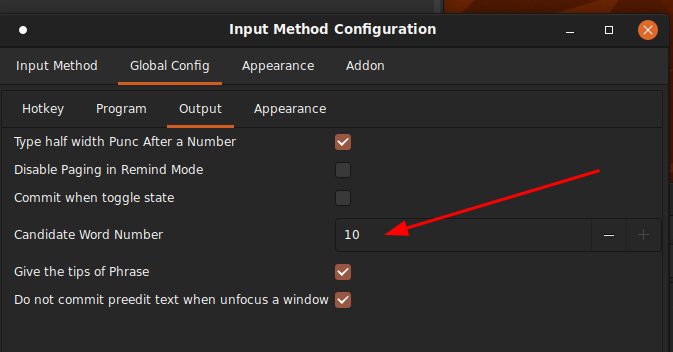
Note that mozc only has a max shortcut of 9 items (instead of 10, that means the ‘0’ key is not available as shortcut key) despite fcitx-configuration’s Global Config has a different idea (which CAP can use the 10th key, aka ‘0’ as candidate selection shortcut)
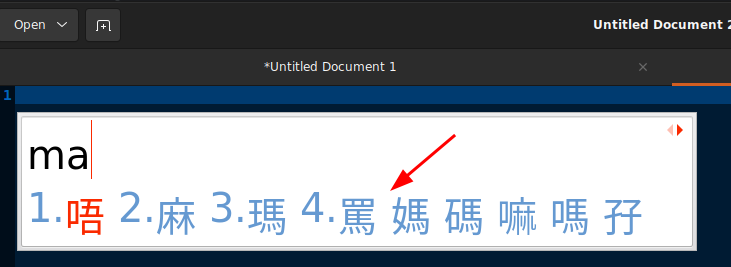
I noticed that after switching ‘1’-‘9’ to ‘a’-‘l’ (or no shortcut) mode, activate it in mozc by using space key to expand selection (this is necessary or the change won’t happen), I get the ‘1’-‘9’+’0’ candidate selection shortcut when I go back to CAP. I also noticed if I messed with the maximum number of suggestions in mozc a few times, I can get into an undefined state in CAP where it shows the candidate selection shortcut for the first few but not the rest, such as this:
I also noticed CAP has one consistent bug that the candidate selection (not just the keys) ONLY WORKS FOR THE FIRST PAGE! I tried to use the candidate selection shortcuts or click on the character with mouse for subsequent pages, it only commit the current word choice disregarding the selection!
I’m spoiled by Greeshot in Windows and I find the gnome-screenshot that came with Cinnamon lacking.
With Greenshot, Print Screen key by default selects an area (which should be the most versatile and productive mode which should be prioritized with least complicated keys) and prompts you on whether you want to copy to clipboard or save a file.
Gnome-screenshot went with the most traditional behavior where Print Screen keys captures the entire screen AND it saves to a default file in ~/Pictures folder with timestamped file names, which I don’t want (I prefer copying to the clipboard).
So natively in gnome, Ctrl is the modifier for copying to clipboard. Shift is the modifier for selecting a section of the screen. So the most common operation I want to do became a bit of finger gymnastics Ctrl+Shift+Print and there are no immediate access to image editor like Greenshot (don’t even bother with GIMP, it’s slow to load and convoluted).
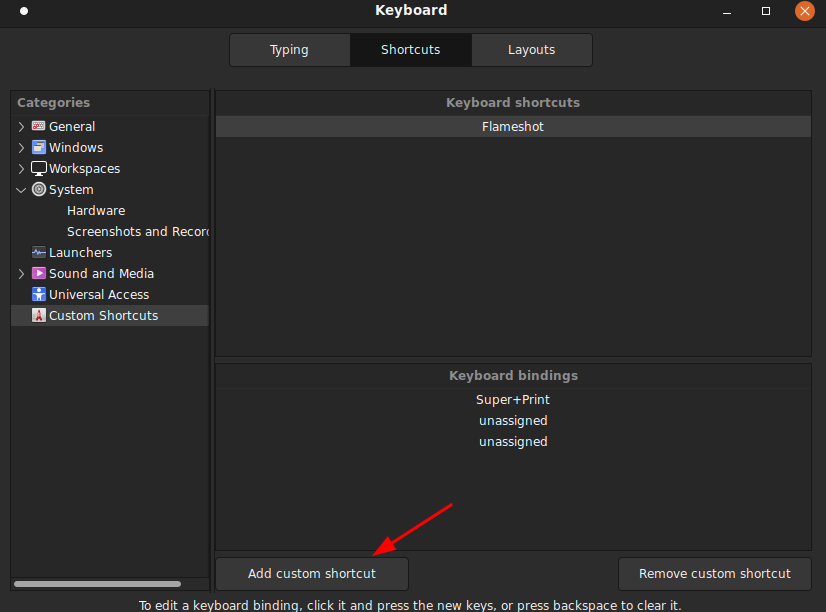
I discovered a much neater app called Flameshot. It has a much quicker design that you can select a section of a screen and do the most common screenshot edits on the fly and copy to the clipboard or save to files, even faster than Greenshot, which opens the captured image into a separate editor and you have to click file->copy-to-clipboard after edits!
Turns out that Flameshot does not use the native gnome’s print screen categories,
so establishing the shortcut has to be done as just a simple shortcut for running the command:
/usr/bin/flameshot gui
and I chose to use Win/Super+Print for Flameshot
Again, the command is /usr/bin/flameshot gui (or where flameshot is located if it’s not under /usr/bin)
Out of the box, Ubuntu cannot resolve hostnames announced by Windows out of the box.
The internet had many solutions from ditching NETBIOS (winbind, wins) but it involves replacing systemd-resolved with the old NetworkManager (systemd-resolved was an extra level of indirection to break VPN ties), which I illustrated in this now deprecated blog post.
Having router assign host names you specify often included a local domain name (must not choose one that conflicts with the internet) such as local or lan. So the computers are accessed in the format of myPC.local or myPC.lan depending on the local domain name you picked. However, it doesn’t take advantage of the hostname announced by Windows computers.
I decided to give the NETBIOS service a second research today and found the missing link to the common solution of installing winbind and adding wins entry to host search order in /etc/nsswitch.conf (you can put it at the end or earlier if you want). I put it at the end as I wanted it to be the last resort
hosts: files {a bunch of things depending on your system} wins
Of course having a wins entry in the hosts search order involves installing winbind make sure the winbind service is running
sudo apt install winbind
The missing piece is editing /etc/samba/smb.conf to inject a name resolve order list after installing samba and winbind:
name resolve order = wins lmhosts bcast
You will need to install samba package first if you haven’t already installed it (for sharing folders with Windows)
sudo apt install samba
The post said the name resolve order section was commented out, but in newer version of samba, the line is simply non-existent. You’ll have to add it somewhere in /etc/samba/smb.conf, I chose to put it right at the beginning of [global] section.
Restart the services after editing to reflect the changes and you can start pinging!
sudo systemctl restart nmbd smbd winbind
So in the process above (installing samba and winbind and editing nsswitch.conf), you’ve also enabled linux to announce its hostname to Windows, which I’ve discussed in this blog post.
So to summarize the concepts,
You need to install winbind to add wins to host search list in nsswitch.conf, but it doesn’t do you anything yet!
Once you installed samba, your linux computer start announcing its hostname to Windows computers
To be able to use the hostnames announced by Windows, i.e. the other direction, you’ll need to add the name resolve order line to smb.conf (samba config file) and restart samba and winbind.
xrdp+xorg is a huge pain in the butt as it does not account for variations in systems properly (or automatically) so often it breaks out of the box.
First of all, if you are using cinnamon (including Ubuntu Cinnamon Remix, I suspect it is the same for Linux Mint too), you will run into this shit after successfully logging in:
This is a GNOME session crash. The information on the web points to some other modes of failure in ArchLinux and the like. That’s not the reason. By going through my own notes on xrdp, I noticed the gut of /etc/xrdp/startwm.sh is to call the executable script /etc/X11/Xsession:
test -x /etc/X11/Xsession && exec /etc/X11/Xsession
exec /bin/sh /etc/X11/Xsession
However /etc/X11/Xsession in term plough through a bunch of scripts in /etc/X11/Xsession.d folder and one step was to look for the executable script ~/.xsession, which is not established by default! For some reason the Xsession scripts can figure out the local desktop environment but not when it’s launched through xrdp!
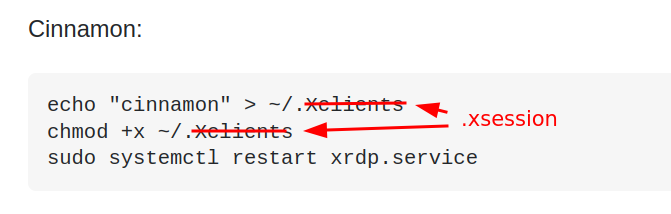
So the solution is to make an executable script ~/.xsession with just one call to cinnamon-session and that’s it!
I initially thought the call was just ‘cinnamon’ because the most popular answer in the Stack Exchange page suggested writing to ~/.Xclients but this redirection was now obsolete and they use ~/.xsession instead:
but when I did that, the desktop loads but there are no icon and the theme colors are way off. The answer was buried here in a comment in one of the answers:
If you want this behavior to be universal across all user (don’t have to establish the ~/.xsession for each user), and is ok with hard-coding to stick to Cinnamon desktop for everybody including local users (i.e. no redirection script to figure out based on context and conditional config files), you can just replace the last two lines of /etc/xrdp/startwm.sh, which calls /etc/X11/Xsession, with simply cinnamon-session.
Geeze! Why does every basic feature in Windows has to turn into a freaking research project in Linux? I’ve wasted so many hours compiling XRDP from scratch from the author’s webpage thinking it’d solve the problem because he had many tutorials for a lot of cases that xrdp breaks out of the box. Turns out they didn’t matter: it’s just that xrdp couldn’t figure out the right desktop environment so it crashed after loggint in through xorg!