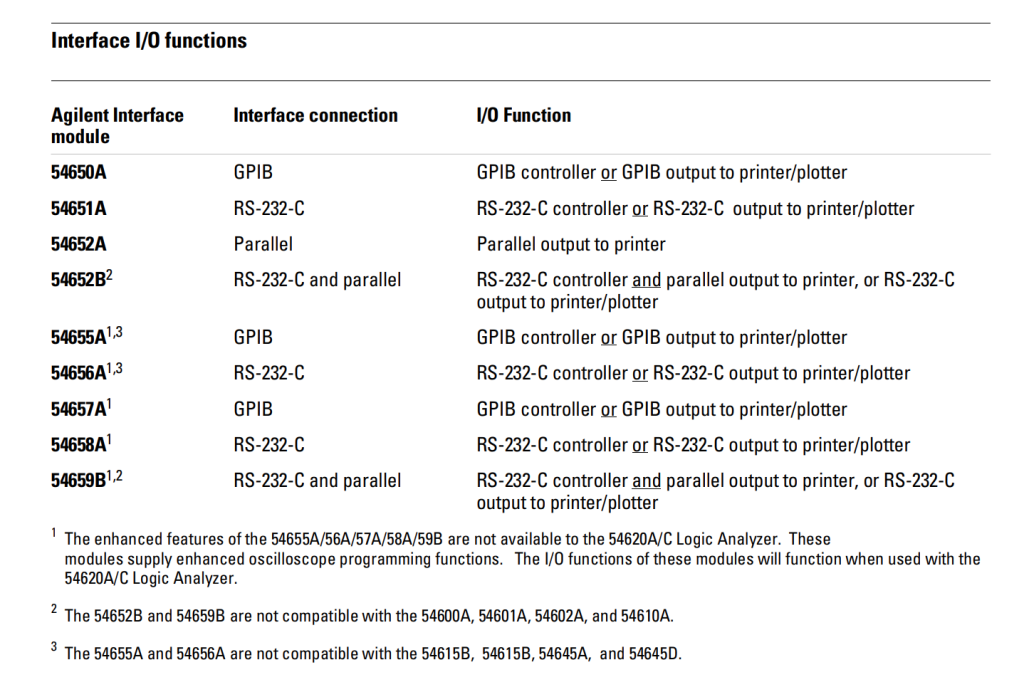
FFT/Time & Math License/Memory: 54657A (GPIB), 54659B (Serial+Parallel)
Serial + Parallel: 54652B (no FFT), 54659B (with FFT)
The matching oscilloscopes/logic analyzers are sorted into 3 main sub-generations:
Too Old (Cannot understand Serial+Parallel): 5460XA, 54610A
Everything in between: 5460XB, 54610B, 54620X
Too New (Cannot understand TAM): 54615/6B (I suspect C too), 54645A/D
Logic Analyzers (54620A/C) is considered “Everything in between” and it gleefully disregards the Test Automation/FFT features as they are only relevant to analog signals.
Only FFT modules have a RTC to keep time. TAM modules are too primative to have this.
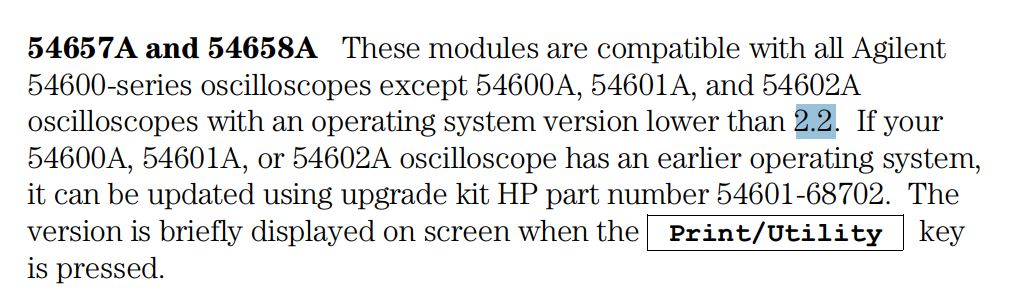
The “Too Old” scopes have newer firmware available that handles FFT (which you need to upgrade by a chip swap if the firmware is too old), but they still don’t understand multiplexing serial & parallel lines they are stuck with 54657A.
54657A covers the broadest range of oscilloscopes (everything). 5460XA with a firmware lower than 2.2 can be updated to use this module.
If you want the FFT and serial port together. There’s only one choice which is 54659B and you have to avold the “Too Old” oscilloscopes. 546XXA is no go. It works for 5460XB if you upgrade it to firmware 1.2 or above.
It’s hard to keep track of this compatibility matrix below. That’s why this blog post explained the reasoning by categories above. It really boils down to what features that are too new (multiplexing serial+parallel port) for an old firmware and what features (TAM) the newest firmware dropped support for.
For newer LCR meters where you can label your measurement setups before saving, using the context menu to enter the names is a painful task, and it shortens the life of the keypads. There’s a quicker way to enter it: send GPIB commands (use Agilent I/O) to it. The command is:
DISPLAY:Line "Profile Name 1"
which you can replace the “Profile Name 1” with anything. Keep the double quotes so the parser won’t be confused by special characters such as minus/dash (-) signs.
If the unit supports LXI (i.e. network interface) such as E4980A, so you can send the GPIB commands through network using Agilent I/O Suite.
Turns out Agilent instruments do not use the same defaults for the RS-232 in their instruments.
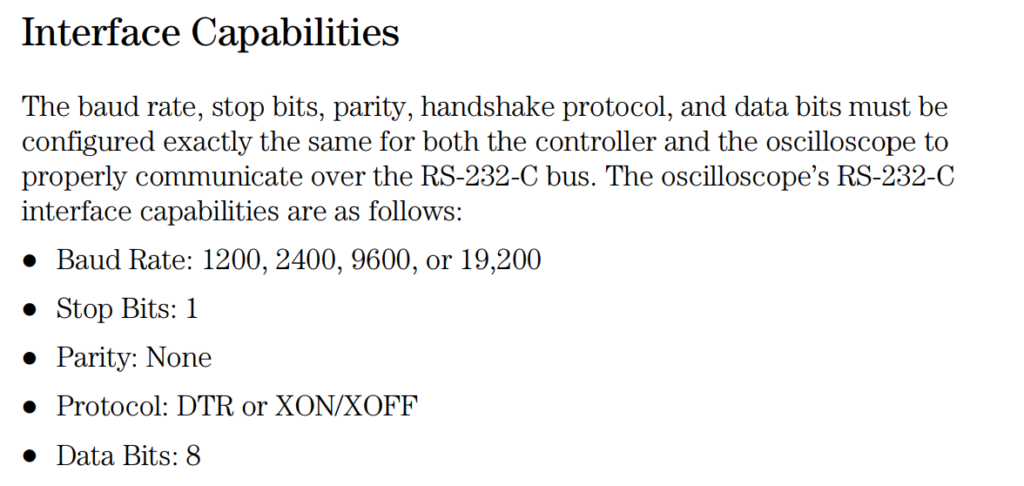
54600 series uses 1 stop bits (most common):
RS-232 modules used in old 54600 series54620/54640 series (newer 54600 series)
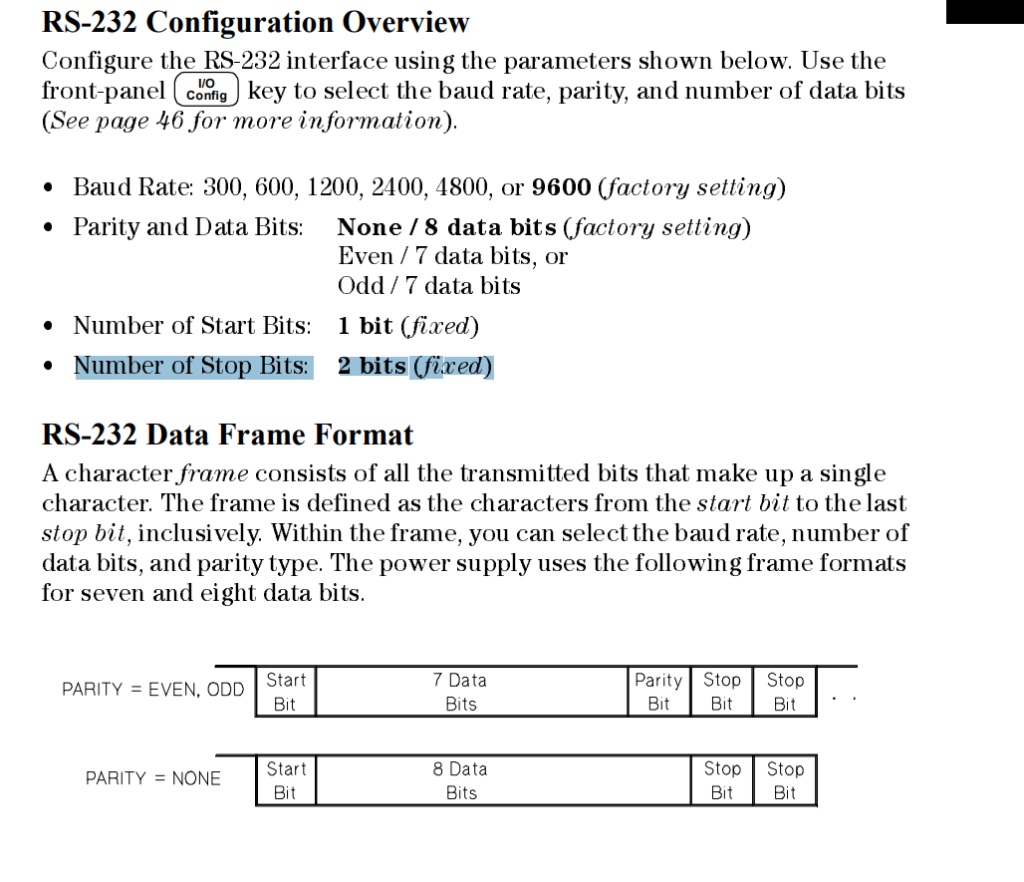
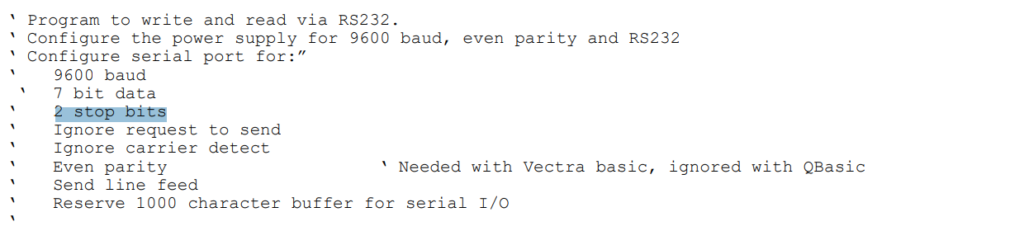
However other bench instruments such as power supplies (E3640 series 663X series) and 33120A arbitrary waveform generator uses 2 stop bits (fixed regardless of parity), which is usually NOT THE DEFAULT for most terminal clients:
E3640 series and 33120A’s RS-232 configuration. Parity only trade away one data bit, so it does not affect stop bit663X series powers supplies’ programming manual aren’t explicit about that except in code example
For the convenience of my customers, I compiled a quickie setup guide so they don’t have the RTFM.
E2050A does not have DHCP. Most likely your network doesn’t have a ancient BOOTP server, so it means you are better off letting E2050A have a static IP address.
The big idea is that you’ll first need to talk to the E2050A, and the only way it can happen is that the computer talking to it has to be on the same subnet (and the corresponding IP address range). Doesn’t matter how you achieve it as long as you keep this in mind. Once you gained access to the router (telnet config screen), you can change the network setting of the E2050A to match whatever network you want to put it on later.
If you don’t know the E2050A’s network configuration, reset it to the default so you have a deterministic starting point and follow the instructions below:
Reset the instrument to factory state by holding down CONFIG PRESET switch while applying power, because you want to know the IP address for sure so you can get into the instrument.
The default static IP address is 192.0.0.192, under subnet mask 255.255.255.0
Most likely your internal network is not 192.0.0.XXX, so you might want to use a computer with a network card (NIC) to talk to the device directly* (point-to-point) first so you can gain entry to the E2050A and change its network configuration.
The NIC on the computer talking to the E2050A must be set to an IP address in the same subnet. This means only the last (rightmost) group of the NIC’s static IP address can be different. An example for the computer’s NIC static IP setting: 192.0.0.190 with subnet 255.255.255.0.
Now you can talk to the E2050A directly by addressing 192.0.0.190. If it’s a dedicated computer for an automation set and you don’t want it to talk to the rest of the network, you are done.
I made up 192.0.0.190. Anything from 192.0.0.1 to 192.0.0.254 works. Thou shalt not use 192.0.0.0 (for it is the network identifier) or 192.0.0.255 (for it is the network broadcast address) or 192.0.0.192 (as it conflicts with the E2050A’s IP).
Most likely you will want to put the E2050A on your home/business network for convenience, unless you want to eliminate network security issues. Then you’ll need to follow a few more steps:
Telnet to the E2050A at 192.0.0.192 to change its static IP address and subnet to fit your network. After saving and rebooting, you must address it with the new IP address you assigned (obviously!).
Note that the default (SICL) interface name on the E2050A is “hpib”, which is different from E5810A’s default “gpib0”. Either change it on the E2050A (it’s called “hpib-name”) or enter the “hpib” for interface name on Agilent’s I/O suite.
You can leave the rest of the settings alone in Agilent I/O suite if you want to simply talk (in its raw, instrument-specific GPIB commands) to the unit without using VISA or SICL layers (standardized syntax).
E2050A has the same software communication interface as E5810A, so you can just select E5810A as the remote interface for the E2050A and remember to enter the correct interface name as discussed above.
Note that E2050A does not work properly (won’t detect) on the redesigned Keysight-branded I/O Suite until version 2019. Please either use version 2019 and after OR the older Agilent branded I/O Suite.
I have E2050A as well as E5810A for sale. Please contact me from my business website (www.humgar.com) or my phone 949-682-8145.
* Unless you are using a very ancient computer, the NIC can auto-negotiate direct connection that you can simply use any regular old straight RJ-45 cable. If you have a really old computer, you’ll need a cross-over cable to do point-to-point ethernet.
GPIB gateway is a device that allows you to remotely control / talk-to test instruments (as well as ancient printers/plotters, etc) that uses the most popular protocol. It’s so popular and timeless that even new test instrument finds a way to support it. This protocol just wouldn’t die.
The major downside of USB-GPIB interfaces (cheaper) is that it requires driver support, which is OS dependent. Keysight can choose to drop support at anytime. You can always fire up a virtual machine to use old software talking to a hardware using TCP/IP, but not reliably with USB (sometimes you get glitches and timing issues with virtual machines especially when it streams live data even at kHz range).
It’s usually a good idea to stick with GPIB if you have an automation setup that involves at least ONE piece of test instrument on GPIB. A ethernet port (LXI) on a modern test gear is fine, but you don’t really want to complicate your code managing network connectivity checks for each IP-based instrument and make sure they work together. With GPIB, you can chain 14 instruments with one gateway so you don’t have to worry about network problems if you can connect to any one of the device on the chain.
E2050A is my favorite GPIB gateway due to its compact size. It’s good enough for most purposes, since I don’t really have any instruments that need or support the extra speed from 488.2. The biggest annoyance is that E2050A does not have DHCP, but uses an an ancient BOOTP instead. This means for modern networks, you might as well give it a static IP.
E5810A is the newer revision of E2050A, with the same internal interfaces. That means all software, including Agilent I/O Suite, fully supports E2050A as a E5810A. E5810A comes with a few minor improvements
it adds a web interface (not very useful other than upgrading firmware)
supports 488.2, which means 9x faster GPIB communication if the instrument supports it
DHCP: automatically acquiring IP address
Unfortunately, E5810A is a bigger unit, partly because the power supply is built-in, and it comes with a LCD screen. Nonetheless, I opened up a E5810A and the inside has a lot of empty spaces.
Telnet is supported for both E5810A and E2050A. For E2050A, telnet is the only way you can get inside the unit and change the configuration such as IP address and interface name. Telnet is pretty easy to use, just get the free, open-source Putty if your Windows does not come with command line telnet anymore.
There’s a E5810B, but in my opinion, it’s pointless because all it adds is a USB-over-IP interface and a front switch. This is something most ASUS routers (especially Merlin firmware) has it out of the box or there are some cheap old USB-over-IP modules (<$50) for it. Basically if you are considering a E2050/E5810, your eyes are on the GPIB instrument base, not the USB instruments that you can put on the network with low cost USB-over-IP. It’s just fluff for Agilent/Keysight to discontinue support for the earlier models to price differentiate from the units circulating in the used market.
I’ve tried other gateways such as NI and Tektronix. There are not many NI gateways floating around and I’ve only encountered even fewer Tek gateways. Unless you have poorly written software that hard-codes to NI or Tek stack, I wouldn’t even bother installing NI/Tek GPIB stack as it can confuse some poorly designed software if the 3 stacks are not configured properly to work together peacefully. Just stick with the GPIB stack from the brand that you can easily get used units for cheap.
Be very careful about NI GPIB-ENET: it does not support anything after Windows XP at all, and there’s no way NI will bother to go back and fix it. For this I wouldn’t even want to touch any GPIB gateways done by NI since they are not as thoughtful about backward compatibility compared to HP/Agilent/Keysight.
ICS was popular a while ago making cheap GPIB controllers/converters. However, they don’t work with Agilent’s I/O suite or NI/Tek stack directly, so you are stuck with using it like a serial port. Given that the price of a used HP/Agilent’s GPIB gateway is cheaper than a new ICS gizmo, there’s no point getting ICS stuff anymore.
I have E2050A as well as E5810A for sale. Please contact me from my business website (www.humgar.com) or my phone 949-682-8145.