xrdp+xorg is a huge pain in the butt as it does not account for variations in systems properly (or automatically) so often it breaks out of the box.
First of all, if you are using cinnamon (including Ubuntu Cinnamon Remix, I suspect it is the same for Linux Mint too), you will run into this shit after successfully logging in:

This is a GNOME session crash. The information on the web points to some other modes of failure in ArchLinux and the like. That’s not the reason. By going through my own notes on xrdp, I noticed the gut of /etc/xrdp/startwm.sh is to call the executable script /etc/X11/Xsession:
test -x /etc/X11/Xsession && exec /etc/X11/Xsession
exec /bin/sh /etc/X11/Xsession
However /etc/X11/Xsession in term plough through a bunch of scripts in /etc/X11/Xsession.d folder and one step was to look for the executable script ~/.xsession, which is not established by default! For some reason the Xsession scripts can figure out the local desktop environment but not when it’s launched through xrdp!
So the solution is to make an executable script ~/.xsession with just one call to cinnamon-session and that’s it!
I initially thought the call was just ‘cinnamon’ because the most popular answer in the Stack Exchange page suggested writing to ~/.Xclients but this redirection was now obsolete and they use ~/.xsession instead:
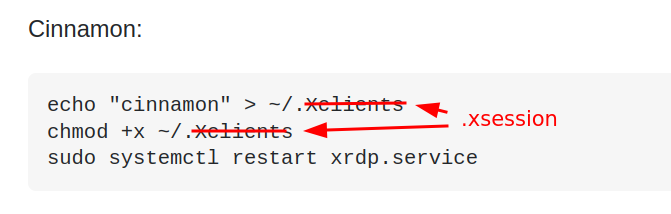

but when I did that, the desktop loads but there are no icon and the theme colors are way off. The answer was buried here in a comment in one of the answers:

If you want this behavior to be universal across all user (don’t have to establish the ~/.xsession for each user), and is ok with hard-coding to stick to Cinnamon desktop for everybody including local users (i.e. no redirection script to figure out based on context and conditional config files), you can just replace the last two lines of /etc/xrdp/startwm.sh, which calls /etc/X11/Xsession, with simply cinnamon-session.
Geeze! Why does every basic feature in Windows has to turn into a freaking research project in Linux? I’ve wasted so many hours compiling XRDP from scratch from the author’s webpage thinking it’d solve the problem because he had many tutorials for a lot of cases that xrdp breaks out of the box. Turns out they didn’t matter: it’s just that xrdp couldn’t figure out the right desktop environment so it crashed after loggint in through xorg!
![]()