ATX Motherboard 433Mhz Wireless Remote Soft Power Button

I tucked away my PC a little away from my workstation desk and the power switch is located at an inconvenient location. I tried to keep the wiring minimal so I’d rather not wire a dedicated ATX power switch onto my desk.

Unfortunately my motherboard does not support turn on by USB keyboard, and I’m not ready to upgrade because I am using it to test PCI data acquisition cards and it’s the fastest one that has 4 PCI slots and they are hard to find nowadays.

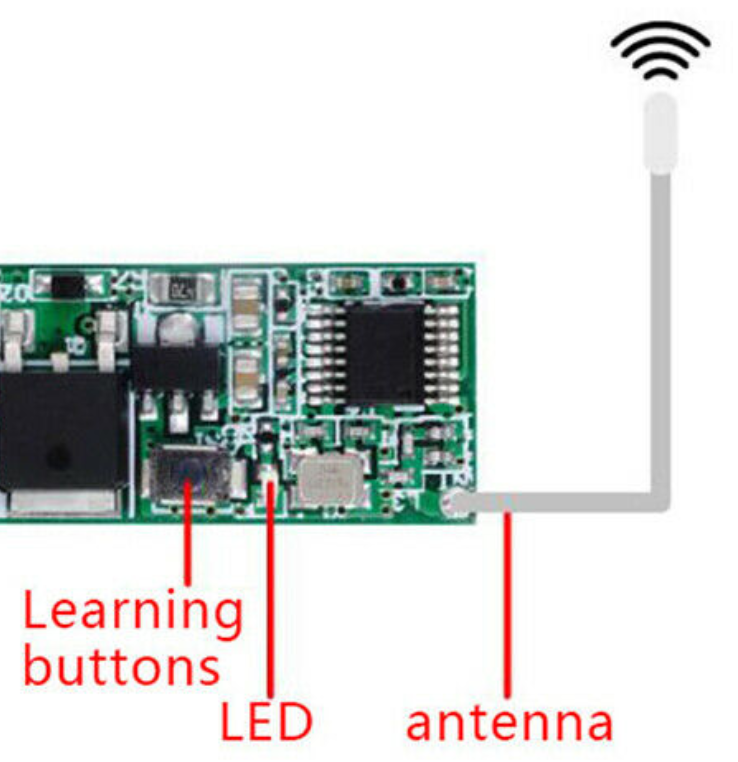
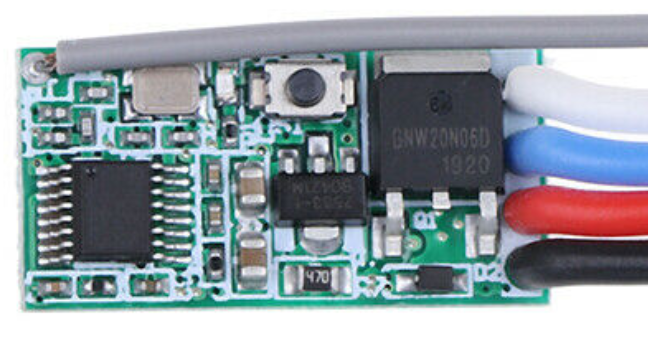
I found a $2.5 wireless module on eBay that claims to switch LED lamps which works on the standard 433Mhz channel and it replicates momentary switch pattern and can operate on 5V (My motherboard is new enough to have 5Vsb from onboard USB header).

Initially I was tempted to get the built-in relay version, but I was worried about the current draw from 5Vsb and those are 12V relays., not to mention the footprint is much bigger (the one above is 22.5mmx 11mm x 8mm).

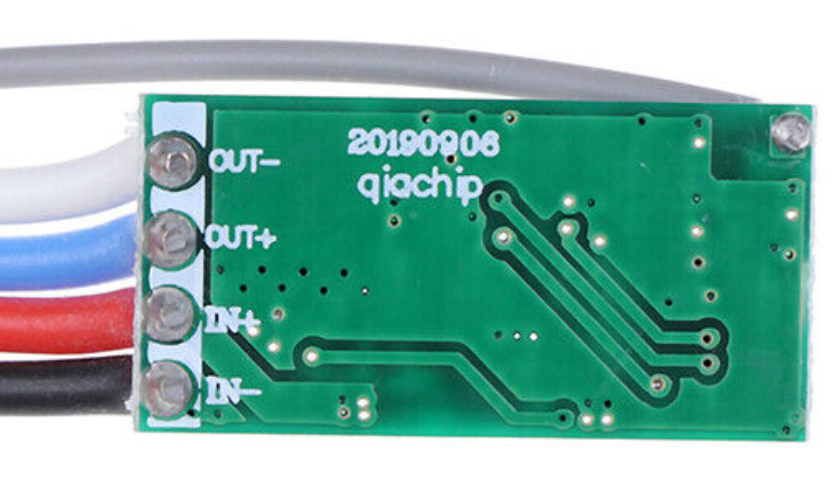
I thought I can figure out with some sort of BJT switch instead of using a relay that has a much bigger current draw requirement, but I realized it’s a pain in the ass because the output is ‘floating’ differential. The OUT- does not tie to the power ground (it’ll short out the unit when I tried to. That’s why I added quotes to ‘floating’ because it’s only relative to OUT+). I also measured OUT+ which is +5V with respect to power ground.

I tried to power a LED and it only works if current flows from OUT+ to OUT- so it’s really sinking current from source power to do that, and it’s unidirectional.

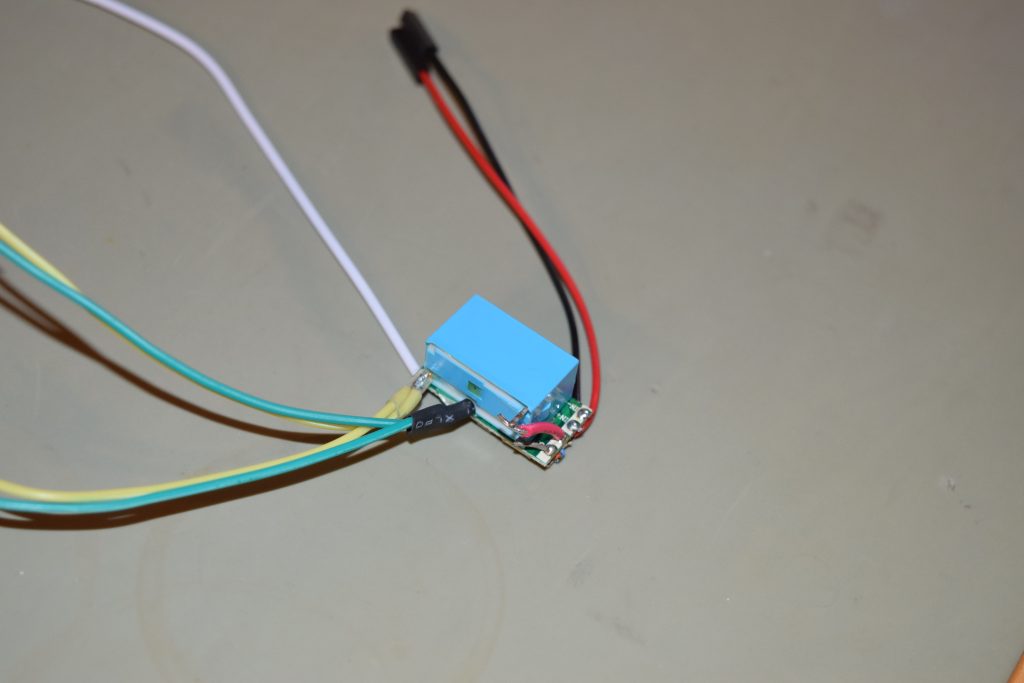
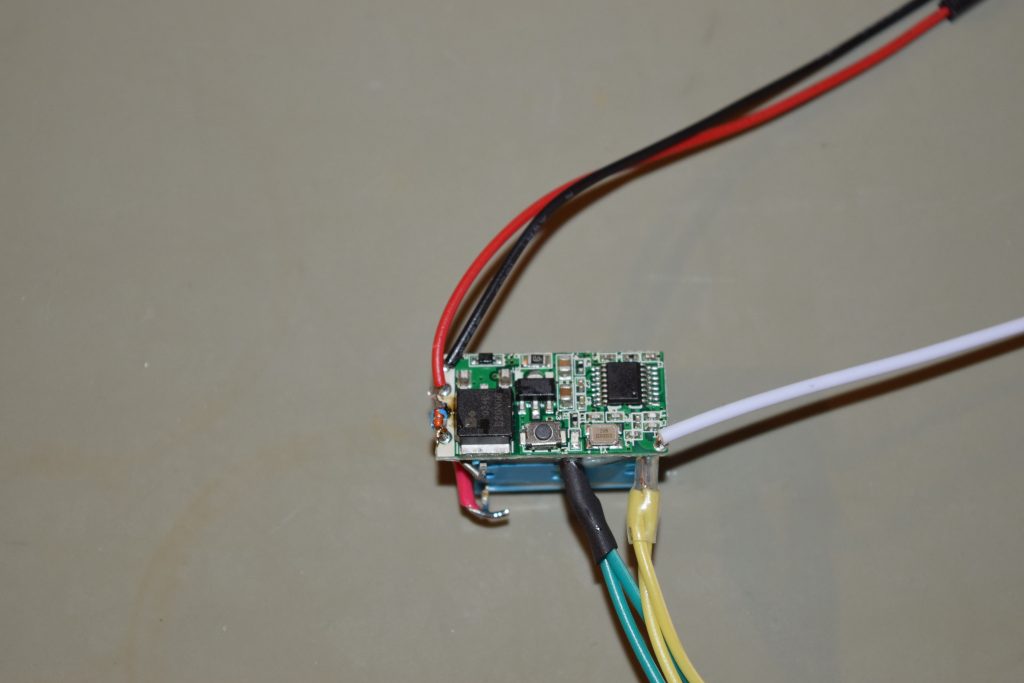
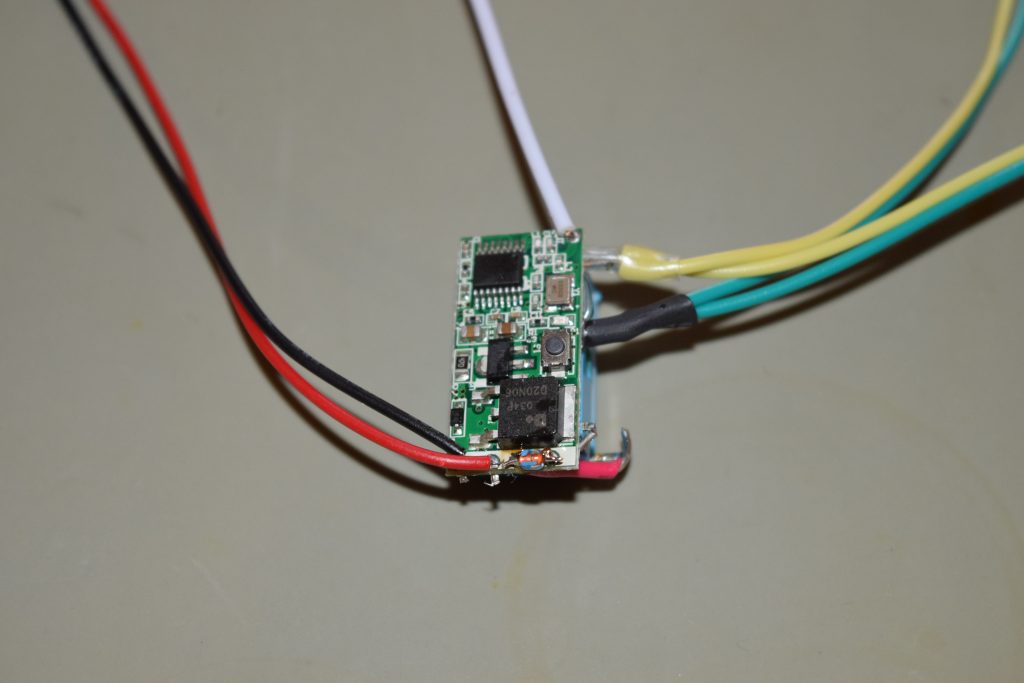
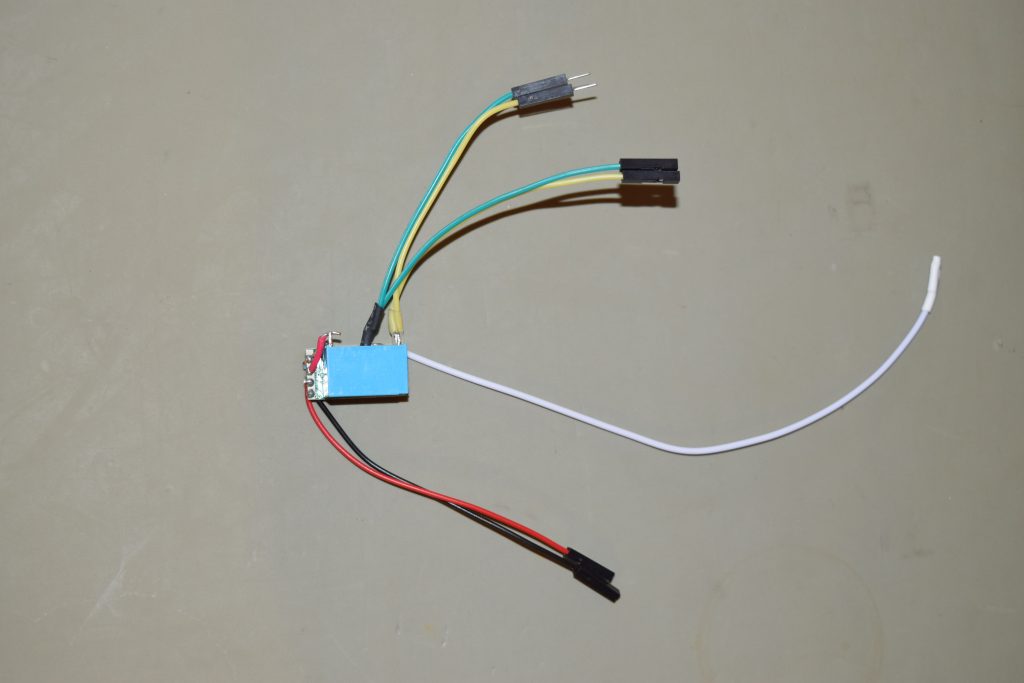
I’d just take a gamble and hook up with a 5V NO relay that I have around. Turned out it actuates with the 5Vsb from the USB header. I glued the relay to the back of the PCB and hook up a flyback/snubber diode (reverse biased) across the relay coil so the back EMF won’t fry my motherboard.

Seems like the transmitter-receiver pair is on momentary switch mode by default, so no addition configuration is needed other than pressing the learn button and immediately press the transmitter button to pair.

I wired a jumper extension cable (male – female) to the relay output from the middle as a by-pass since I’d like to keep the original power switch’s functionality (so it’s basically OR-ing between hardwired switch and the wireless remote 433Mhz switch)
Here’s an example of taking 5Vsb from USB header and tapping into the power switch jumper in Front-Panel jumper block:
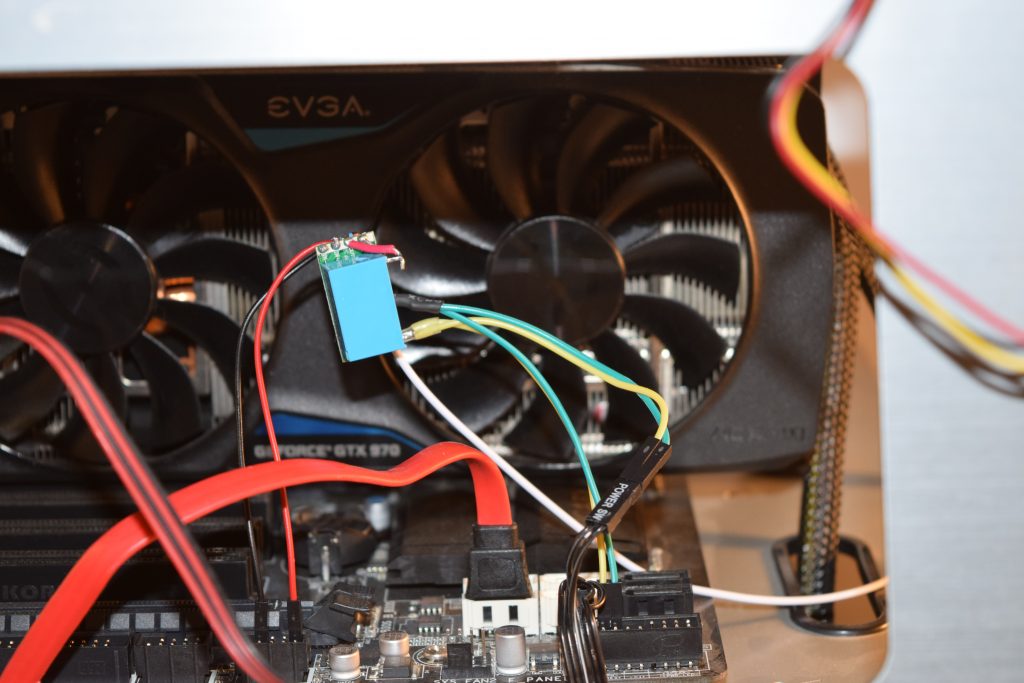
Note that the PWR SW- pin is connected to the ground. Since I’m using a relay, the relay output is floating so the polarity does not matter.

Loading

Updates to Linux on Pogoplug v4

I have an old Pogoplug v4 series hacked to install Debian Linux based on this instruction long ago: http://blog.qnology.com/2014/07/hacking-pogoplug-v4-series-4-and-mobile.html
which boots on an SD card, which I used as a no-ip update client.

I realized some of the URLs to the package servers are broken. So here’s my notes to update it.

First apt-get doesn’t work anymore because the files has been moved to the archive package server. The solution is to replace all the contents (now obsolete) in /etc/apt/sources.list by this line:

deb http://archive.debian.org/debian wheezy main

Then you update the package manager (apt-get) with this command:

apt-get update && apt-get upgrade

Note that it’s still Debian 7 and it will not work with new software that requires later versions

Loading

OKI C3200N Color LED Printer Toner Reset

I’ve had my C3200N printer as a workhorse for a decade until it died. Before I toss out the service manual and the instruction to reset the toner, I’ll put it here for those who still got mileage left for the printer

Here’s the service manual:
http://upload.evocdn.co.uk/olivetti/uploads/download/d-ColorMF200-240_sm_Y105560-07.pdf

Back up here:
C3200N_Service_Manual

The important pages where the service menu is in page 124-125 (Maintenance Menu), 134-136 (Menu Tree), 152 (Factory mode = Do not cut fuse of consumables)


Summary (https://www.fixyourownprinter.com/forums/laser/23029):

*** Do NOT use NV-RAM INITIAL RESET. It’ll screw things up (like losing MAC address). You can go into the service menu to reset toner, drum, fuser and belt individually***

Here’s the directions by user “Nono” which I think it’s the best:

A C3200N here…

I never wanted to do the NVRAM complete reset because I was scared of losing the network MAC address as mention somewhere else on this forum. And basically controlling the consumable level independently was interesting… My c3200n printer was bought last month (09/2006), guessing here that the bios may be different depending on release date (this walkthrough might not work for everyone).

Sooooo, after much button pressing, restarts and coffees.. here it is:

Get to the standard “Diagnostic mode” as describe on this thread:

1) Turn off printer.

2) Turn on printer, while holding the + and – buttons.

3) The LCD Shows “OKI User”, Scroll to “Engine Diag Mode”, press “enter”.

The display shows “Diag Mode 01.02.02 S-Mode” as mention multiple times on this thread.

At this point you should wait for the initialization cycle to complete. I mean for all the motors and gears to have finished their noises and cycles – otherwise you will end up with a LCD switching between two different info screens – not a big deal but still annoying.

Now we want to go in “regist mode” by:

1) Pressing the “Online”, “Cancel”, “Enter”, “-” and “Back” AT THE SAME TIME (not in any sequence – at the same time). Yes! That is 5 buttons.

2) After within two seconds the LCD menu will show “READY”. If it doesn’t, release button and repress buttons again.

3) The buttons release sequence is important. So, read this before letting go your five fingers: Release the “Enter” button first and THEN the four others. LCD is still showing “READY”.

4) Press the “Online” and “Cancel” button at the same time BRIEFLY. Don’t wait before pressing them after the five fingers sequence otherwise you will miss your time slot.

You can always switch back from the “READY” to the “Diag Mode 01.02.02 S-Mode” menu by pressing the five buttons again.

Don’t laugh. I know it seems a lot of gymnastic. Well I guess they didn’t want the user to find that one easily.

Now you see “Eng Diag Level 2”

Taking from someone else on this thread (with some modifications for the c3200n):

Press either the + or – button until “CONSUMABLE COUNTER SET” is displayed, press the Enter button; you are now in the menu to set various consumables.

1) Press either the + or – buttons to scroll through the various consumables, at the desired consumable (ie. “K-ID UNIT …” for the Black Image Drum Unit, “C-Toner” for cyan toner, etc.), press the Enter button and the last digit of the count will start flashing.

2) Press the Cancel button to decrease the digit amount or press the On-line button to increase the digit amount; press the + or – buttons to move along individual digits in the count. Note that it will not show the remaining but the usage (100\% means it is empty).

7) Once the count is at the level you desire, press and hold the On-line, Cancel simultaneously until the numbers stop flashing; you have reset that consumable’s count to the number you specified. Note that you may end up with a different value then the one that was entered when saving. The printer engine is probably jumping to the nearest registered/acceptable value. If someone find a way to save the exact value, let us know.

8) Press the + or – buttons to move to the next consumable and repeat at step 5.

9) Once all consumable counts have been set to desired amounts that are below their end-of-life thresholds, you can use the Back, +, & – buttons to exit through the menus (reverse of steps 2 through 4) until “INITIALIZING” is displayed. Or turn printer off and on.

10) You’re finished! Now log in to the web interface with your browser and check to see the remaining life of your consumables.

There is another way to get to the “Eng Diag Level 2” menu – I did it at one point but wasn’t able to reproduce. But this method worked for me even if you may need some practice. You can also get to level 3 and level 4 after the release of the five fingers step by pressing something else then the “online” and “cancel”.

Good luck.
Nono

by unknown on Oct 19, 2006 at 12:46pm

Loading