Bump 1: Dick move from Proxmox
The first thing that trips me from Proxmox is the downloadable, despite it said it’s free if you don’t use their enterprise repository, is Enterprise (paid) version out of the box, with no option to download the free version that’s configured as free/community edition.
It’s a dick move to greet ALL new users with this, hoping to scare them to consider a subscription:
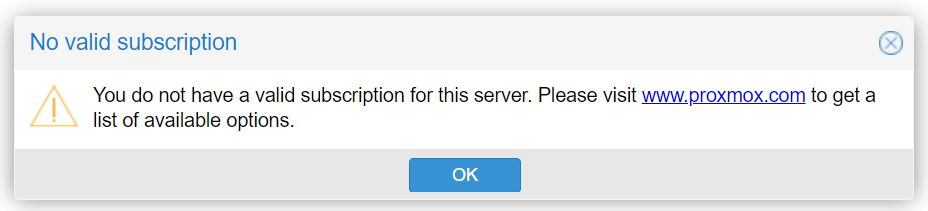
I don’t think frustrating people who are trying to learn/explore the software will make them want to pay for a subscription. The best this dick move can do is to scare new users away as the user might think they did something wrong getting things they don’t expect. I certainly thought of throwing out Proxmox had there be better options out there when I run into this, as I’m still evaluating whether I should go with Qemu or Hyper-V.
First of all. This scary message doesn’t actually block you from using Proxmox. It’s just that you don’t get updates until you either pay for their enterprise repositories or change to the free repositories. At least you can still use the interface to gain shell access which we’ll need to fix it (or you can go to the physical computer and enter the same thing in the text terminal display locally)
The difference between enterprise and free is just which servers the update repositories points to. Getting the latest and greatest is not necessarily a plus for enterprise users so they let free users take the risks first and provide feedback so they can polish their software. Fair enough. Great model.
There are two parts to fixing this ordeal:
- Configuring the update repositories to the free no-subscription repositories (Functional issue, and it’s per node, including slave nodes)
- Removing the nag screen (Cosmetic, and it’s the overall Proxmox, aka the main node hosting the Proxmox management interface)
Fix Subscription Scare Part 1: Updating repositories locations
Basically, what you’ll need to do is to notice edit the lines file names show below (underlined in red) corresponding to the repository URL path you want to change:
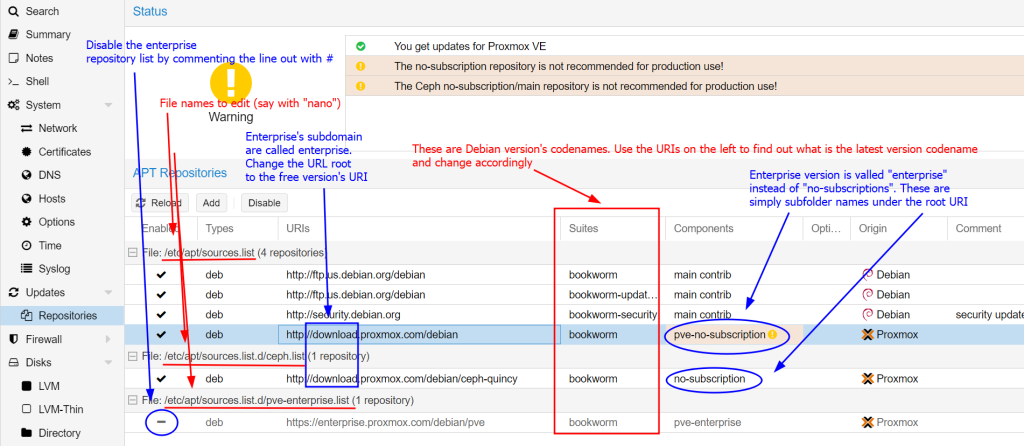
/etc/apt/sources.list.d/pve-enterprise.list is not necessary for free users, so you can simply comment all the lines out (there’s only one line)
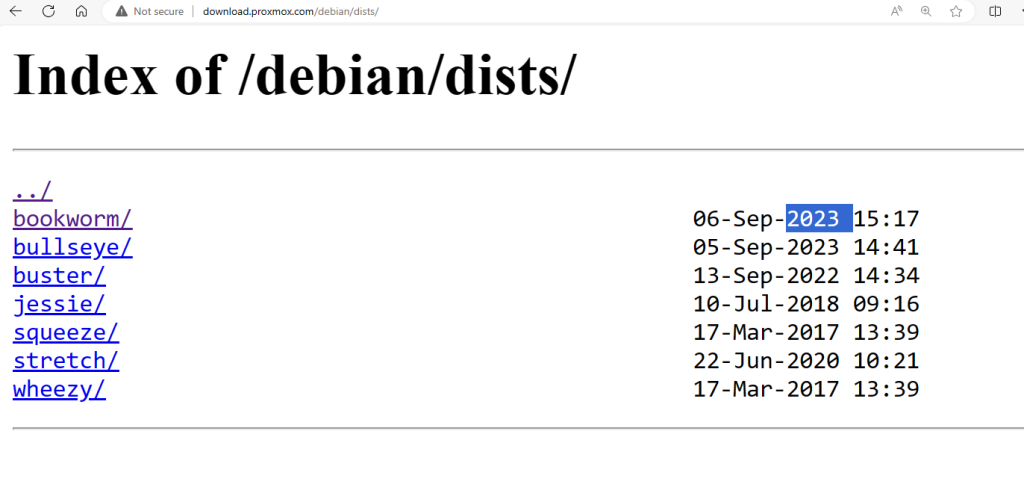
/etc/apt/soruces.listhttp://download.proxmox.com/debian/ and see what’s out there. What’s not spelled out in the web admin interface is the intermediate folder called ‘dist‘

bookworm is the latest Debian version’s code name at the time of writing
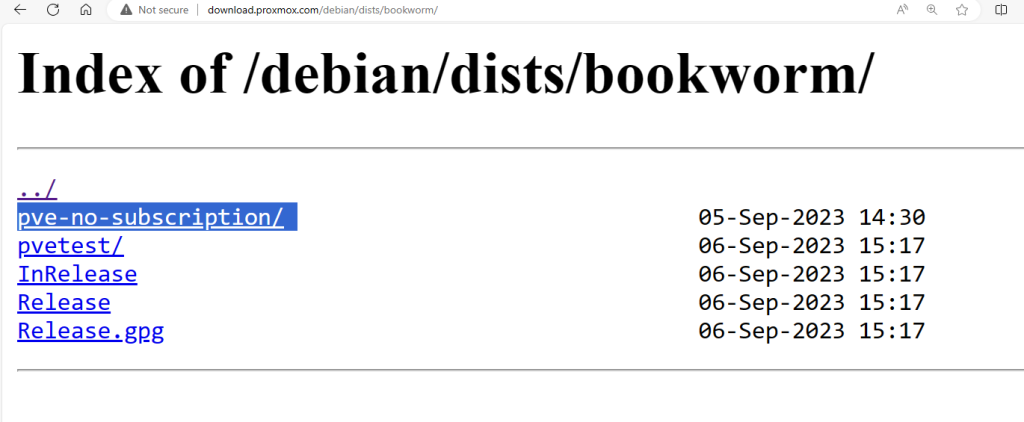
and obviously we pick the branch/sub-folder that says no-subscription (there’s no enterprise here since it belongs to a different root URL), but you still have to get the name right for the ‘Components’
You can open it with a text editor like nano:
nano /etc/apt/sources.listand edit this proxmox’s repository line (remember to skip the ‘dists‘ intermediate folder). Every space after a word that is just a subfolder you see from the folder structure. If Debian released a new version/codename, you might also want to update the first 3 lines of debian repositories as well to match the name code name (and folder structure if they rearranged it).
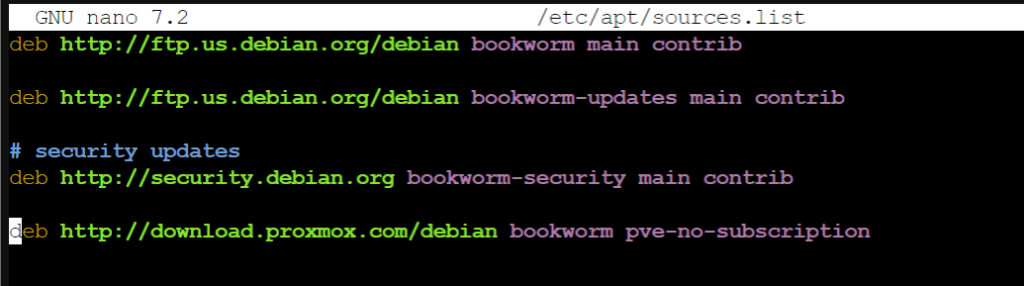
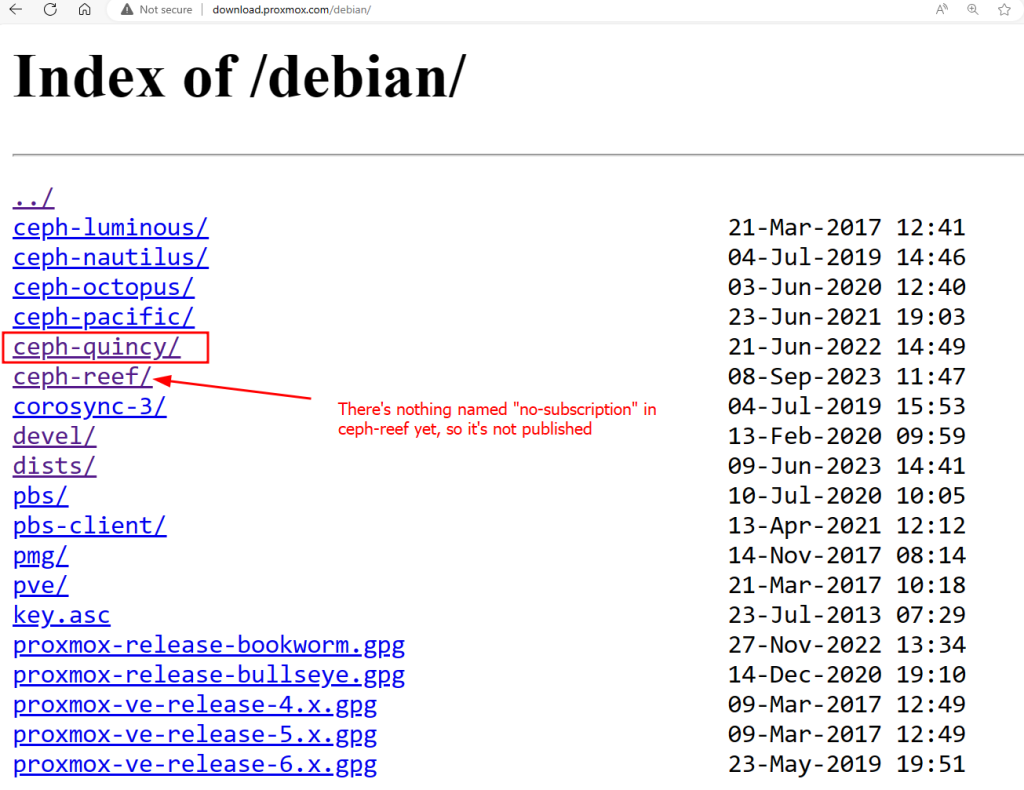
Ceph is an optional feature (not installed) yet it’s configured to be enterprise as well, so for consistency, we might want to change it to the no-subscription (free) version as well. The latest codename for ceph that was published at the time of writing is “quincy” (there’s nothing in the “reef” folder), so we click on it.
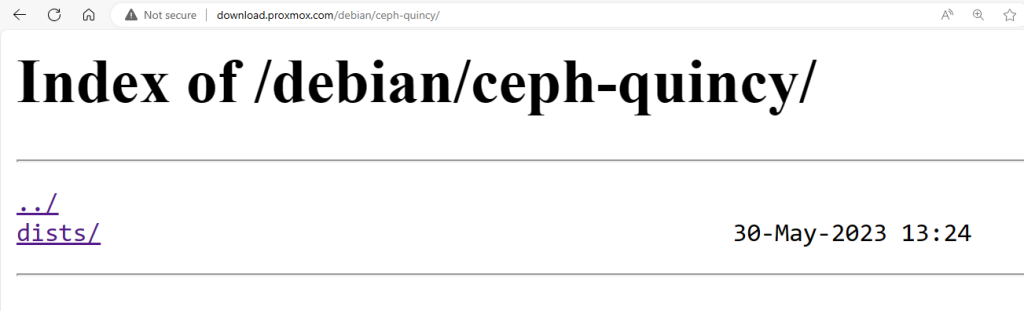
Again the ‘dists’ is boilerplate and not spelled out (so we don’t enter it) in the entries of the repository sources file.
bookworm is the current Debian version for that
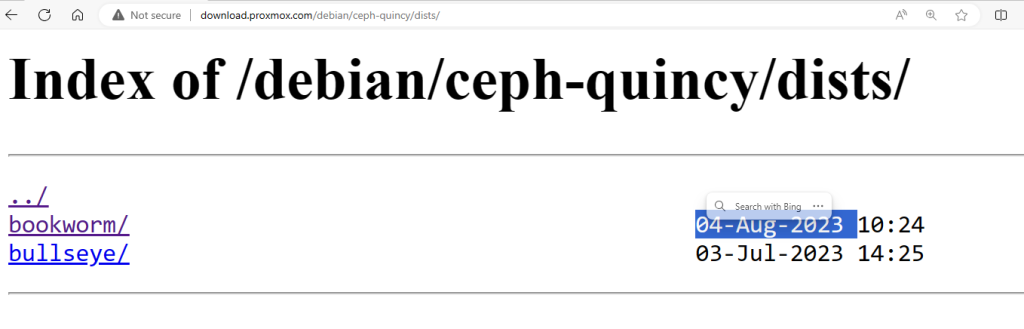
and we see a “no-subscription” folder which is the one we want obviously. We can just guess by sensible names you’d choose if you were the developer.

You can again open a text editor like nano to edit the repository location file as shown in the web admin UI
nano /etc/apt/source.list.d/ceph.list
And finally, disable /etc/apt/source.list.d/pve-enterprise.list
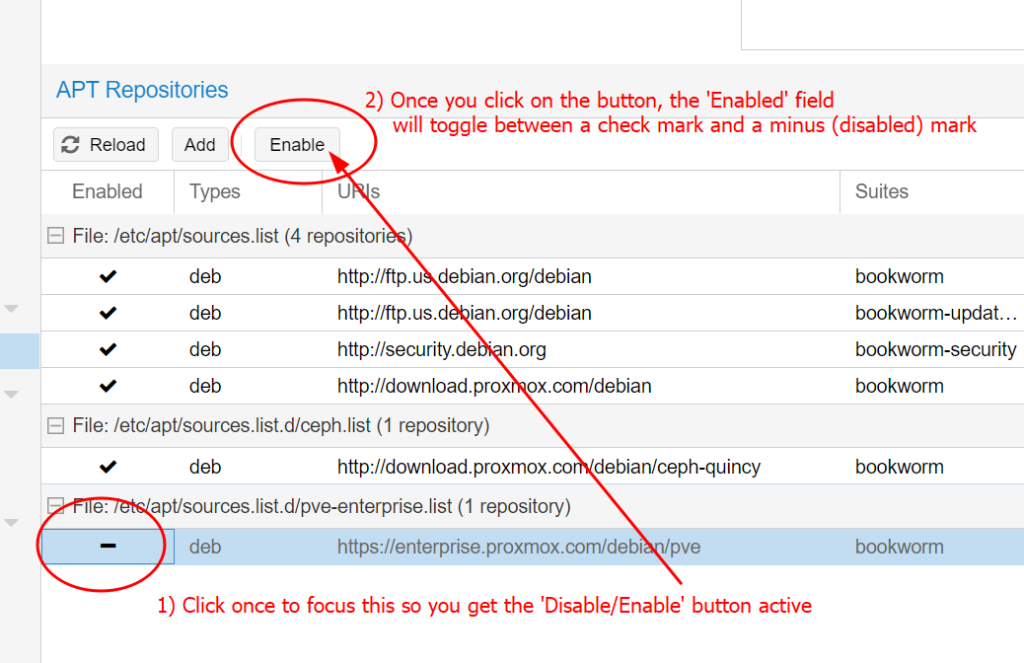
Under the hood, it’s basically Proxmox adding a # (comment sign) to disable the line in /etc/apt/source.list.d/pve-enterprise.list with the similar procedures we did:

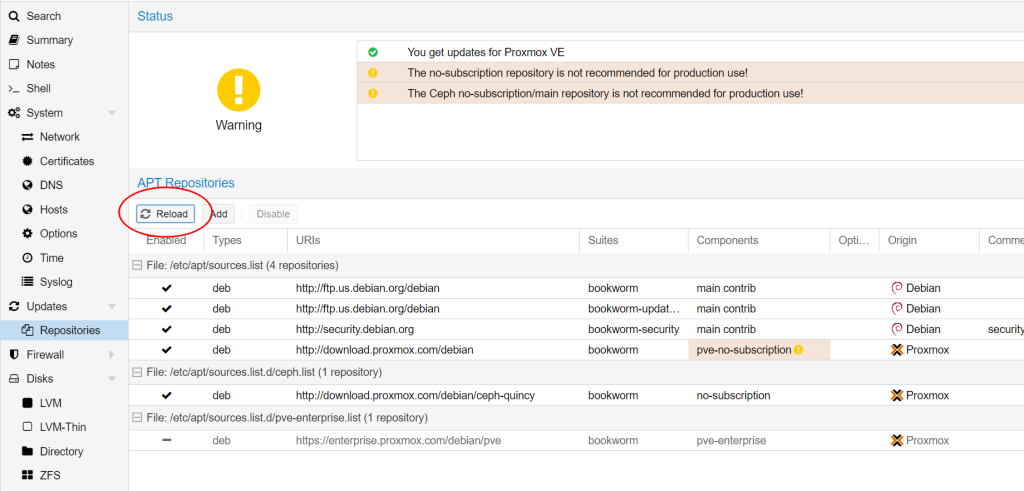
Hit Reload and you are done with this subscription scare tactic.
Actually out of consistency, you can build your own pve-no-subscription.list to repace pve-enterprise.list and replace ‘enterprise‘ in the root URL with ‘download‘, update the Debian codename (at the time of writing it’s ‘bookworm‘), and the change the components folder from ‘pve-enterprise‘ to ‘pve-no-subscription‘, which translates to crawling this repository path: http://download.proxmox.com/debian/pve/dists/bookworm/pve-no-subscription/
There’s nothing fancy and hard-coded about these names. It’s basically the URL of where the update files are stored with an intermediate folder ‘dists‘ sandwiched between the root URL and the tokens (separated by spaces) which are basically subfolder names. All it does is to attach a ‘/dists/‘ after the root URL and replace the rest of the ‘/‘ with spaces.
It simply looked like the developers for the web admin UI didn’t have the time to get to making the table entries clickable and editable yet and they merely got to make the enable/disable button to comment out the lines in the file. You’ll see similar UI deficiencies in a lot of places later which you’d have to go to the shell to do it yourself after researching the concepts.
Fix Subscription Scare Part 2: Removing the nag screen
Even after you fixed the repository locations, it’s only per node, yet the nag screen is at the top admin UI level. The Updates/Repositories interface won’t show error messages (undownloadable repositories) anymore, but the nag screen still needs to be addressed.
Luckily somebody wrote a script to deal with it, hosted on Github:
# Download script
wget https://raw.githubusercontent.com/foundObjects/pve-nag-buster/master/install.sh
# Good practice to read ANY unknown script to make sure there's no shenanigans 1st

# Then run the script with sudo
sudo bash install.sh
This blog shows the mechanisms in case if some changes broke the script above.
TAP Networking not in the Web UI
TAP interface is necessary for the ethernet card on the VM directly interact with the router connected to the physical hardware (PHY/NIC) but with a different identity, which puts it at equal level as other physical computers on your network. This is often useful when you want to host servers.
I’ve adapted the instructions from Extremecoders on Github here as the default ethernet device names are different
- Debian doesn’t use the /eth0 naming scheme anymore. It’s /enp4s0
- /br0 now has a prefix “vm” in front of it since it’s a virtual bridge. Proxmox created this by default. The ‘bridge’ in this case is not in the ethernet bridge we understand in Windows (which bridges two interface together as one), but instead it’s just a virtual ethernet switch. Once I know this twist, I understand how to set TAP up
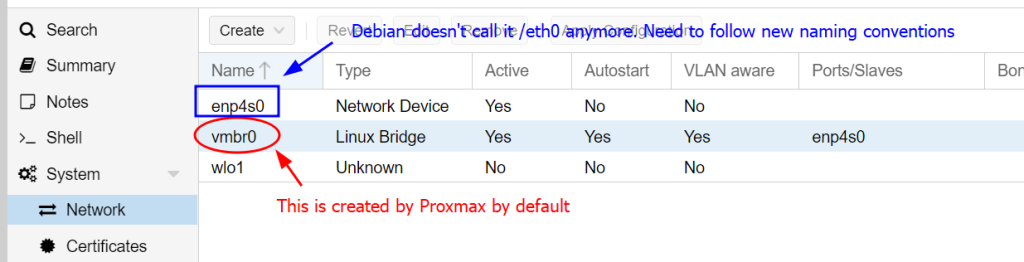
Since we are using the /vmbr0 which is already set up, we can skip the bridge creation and adding the physical network card /enp4s0 to the /vmbr0 ‘bridge’ (virtual switch).
The core step is to create a TAP interface. Let’s call it /tap0
tunctl -t tap0You don’t need the “-u (username)” part unless you want to assign ownership of this specific TAP interface to a specific user.
Then you need to add this TAP (/tap0 in this example) to the ‘bridge’ (/vmbr0 in this example). ‘addif’ means ‘add interface’. ‘brctl’ means ‘bridge control‘
brctl addif vmbr0 tap0Make sure all the physical card (/enp4s0), the TAP interface (/tap0) and the ‘bridge’ (/vmbr0) is up. Then assign IP to the ‘bridge’ /vmbr0. If using acquiring new IP address from DHCP, use DHCP client (dhclient):
dhclient -v vmbr0Pools for resources
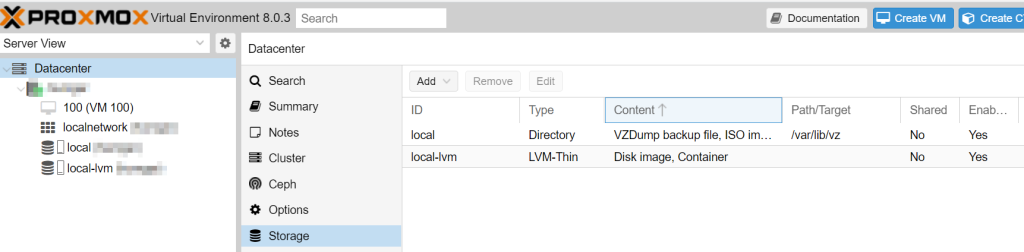
You can directly create the virtual hard disks directly from where you are configuring your VM, but you can only delete it from a Pool viewer. This is the same as VirtualBox. ‘local-lvm’ is a bunch of virtual hard drive images that you need to mount to act like a hard disk drive. Your VM images lives in /dev/pve

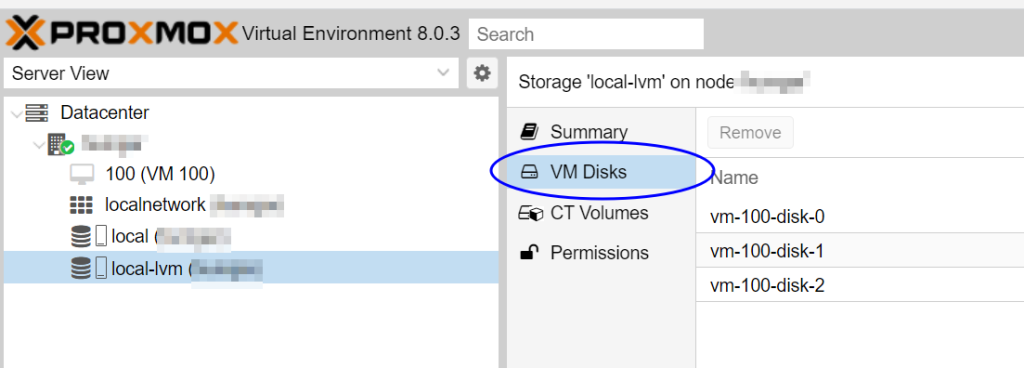
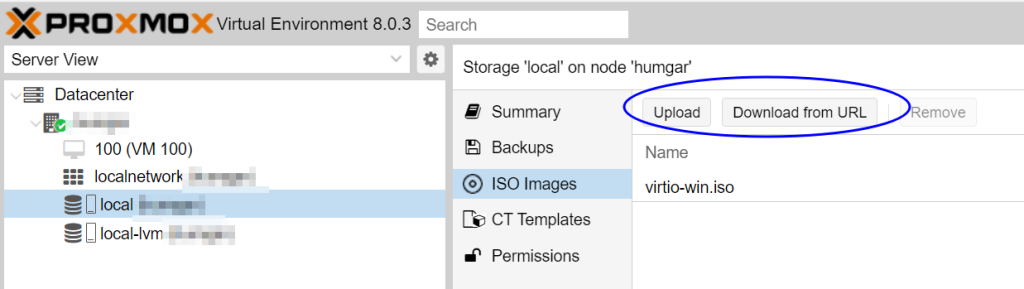
It’s a little more rigid than VirtualBox where you can directly point to the CD image. In Proxmox you have to upload the CD image to a pool before referring them in the VM’s settings. ‘local’ is just a folder of files (specifically /var/lib/vz), and the CD images goes to /var/lib/vz/template/iso.
Actually local and local-lvm are all defined at the root level called ‘Datacenter’
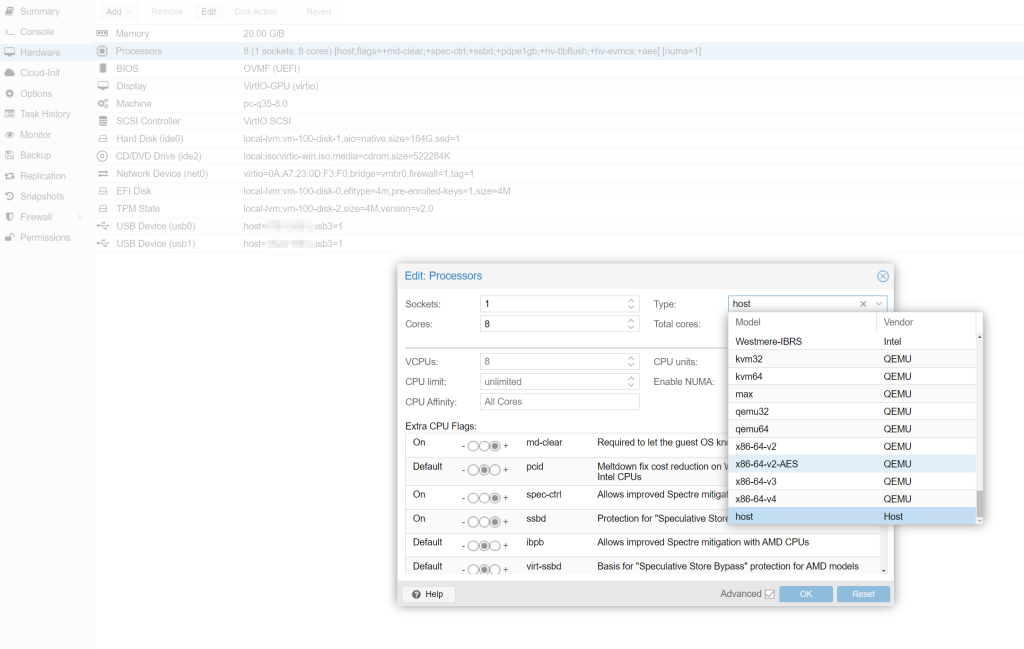
Default CPU
By default Proxmox choose x86-64-v2-AES for you, which might have better compatibility. I had trouble with the Windows port of Qemu not supporting hosts because my CPU is too new for it, but the Linux Qemu-Kvm have no trouble recognizing my new CPU under ‘hosts’ type. Look into the extra CPU flags to match whether you are using an AMD or Intel CPU.
![]()