I thought the TDS500~800 series design is already frustrating to service. But TDS7140 (or DPO7000) takes the cake. Whoever the a**hole designed the chassis made it a f*cking lettuce wrap. It’s not even an onion that you can predictably guess how you’d approach it.
To get any meaningful access to the insides, you MUST first remove the plastic front panel bezel, which is a fragile part that if you didn’t get the plastic hooks right, you’ll break it when you try to force anything. The service manual is not helpful. Likely written by somebody with a ‘fuck it. somebody’ll figure it out’ attitude.
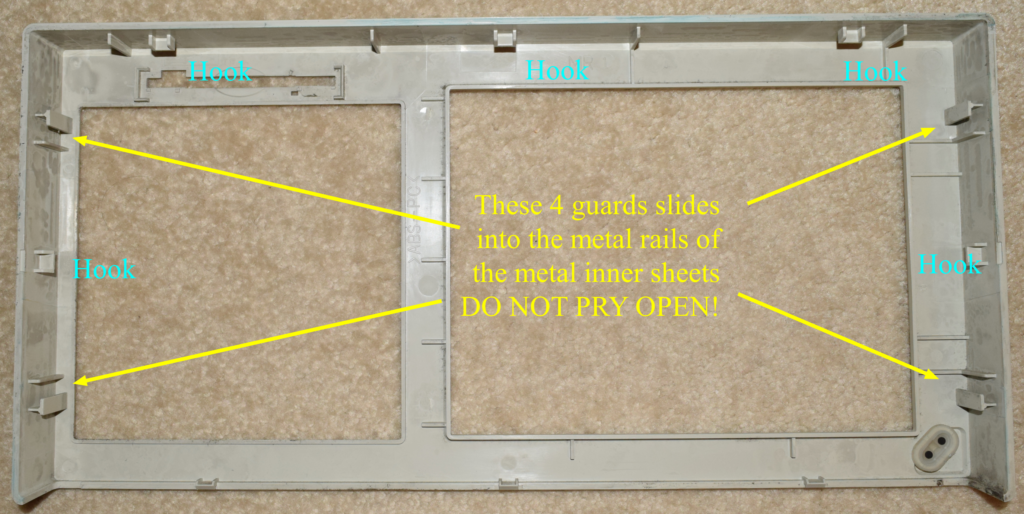
This can be seen by the service manual giving an exploded view diagram without a precise order-of-removal dependency graph, nor the decency of telling you where each hook is and which of them are slides that must not be pried open like hooks. This is basically is tricking people to break the front bezel because those who didn’t know this already won’t know until they shine a flashlight to investigate the geometry around the hooks before releasing the front bezel.
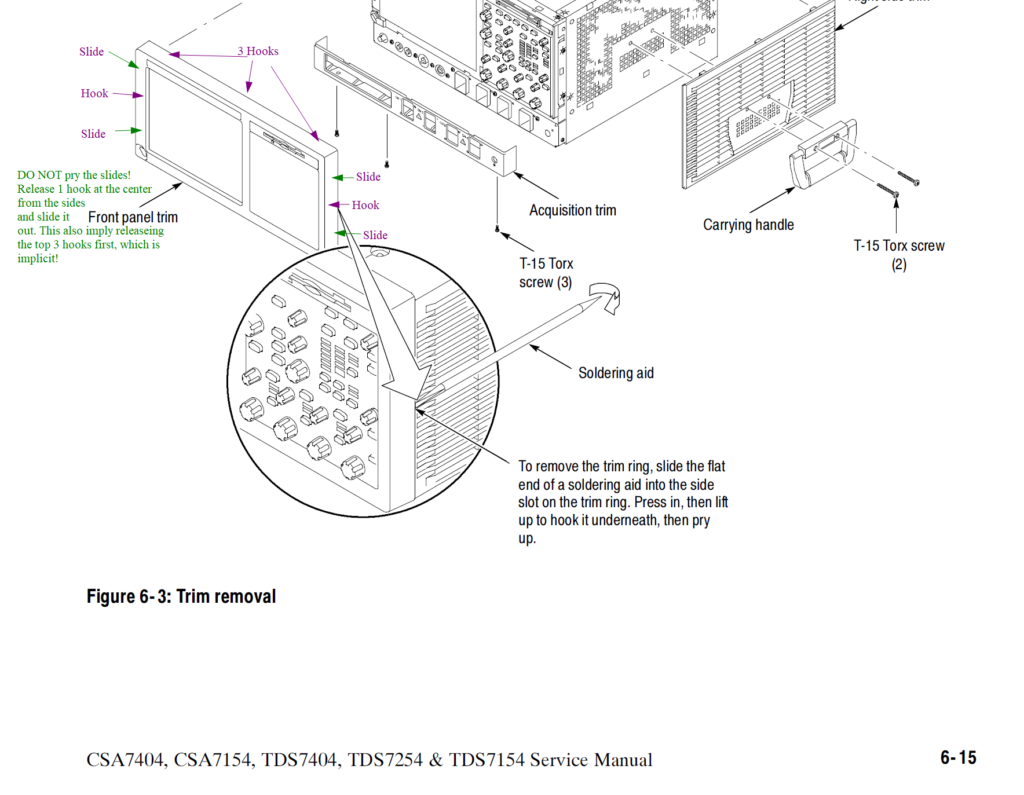
It’ll make much more sense if you see the insides of the released front trim/bezel:
Not to mention that that black (lower) Acq front panel trim was double-sided taped to the BNC panel because it’s so easy to f*ck up the plastic to get access to the insides of the unit. The bottom trim is supposed to come out first (because there are no hooks) but I wiggled the upper part out first, luckily without damaging the bottom hooks, because of the silly double-sided tape used for the lower trim.
None of these were mentioned in the service manual. It basically said “there are some hooks in the front panel, pry them open and pull it out. Good luck!”. Mixed with a flimsy, non-intuitive chassis design, it’s pretty much telling Tek outsiders to break the front trim.
I really couldn’t believe some f*cker who’s a delight to deal with would design a case with an insane order of disassembly so I read the vaguely worded manual over and over again to see if there’s a step I can skip to get partial access to the PC motherboard inside. I couldn’t find any so I gave up and followed the painful disassembly order and realize the design was indeed evil and fully intended to shove it up the a$s of whoever that’s trying to repair the unit, which is me in this case.
The service manual is also very unhelpful that they first told you to remove all the knobs yet the rest doesn’t depend on it. The real first step is to remove the front plastic trims. Nonetheless you need to remove the carrying handle because it’s bolted to the right side of the sheet metal.
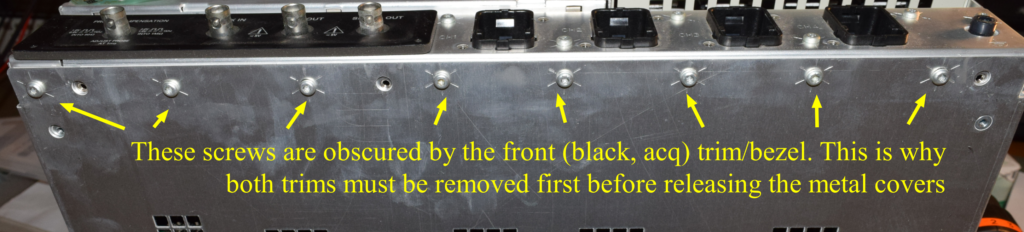
The take away is that the Mushu-chicken lettuce wrap is that the top and left side is one sheet metal, while the right and bottom side is another sheet metal in one straight piece. What’s really frustrating is that you cannot just move the top-‘n-left half cover in isolation because it’s sandwiched by the right-n-bottom half cover, which in turn it’s bolted down by the screws that are obscured by the front trim:
This is madness!

HP/Agilent/Keysight doesn’t do this kind of abusive design that reeks evil. I should start charging more if people sends me a Tektronix to fix if I have to deal with the damned disassembly maze.
Another bit that shows whoever wrote this damned service manual didn’t give a shit is the instruction to take out the 2-in-1 CD+HDD bracket. A normal person who dealt with Agilent Infiniium unit would expect the 2-in-1 bracket should come out on its own in one piece. This is not the case for this damned Tektronix scope.
Here is all the information available from Tek on how to do it (which is both incomplete, misleading and confusing):
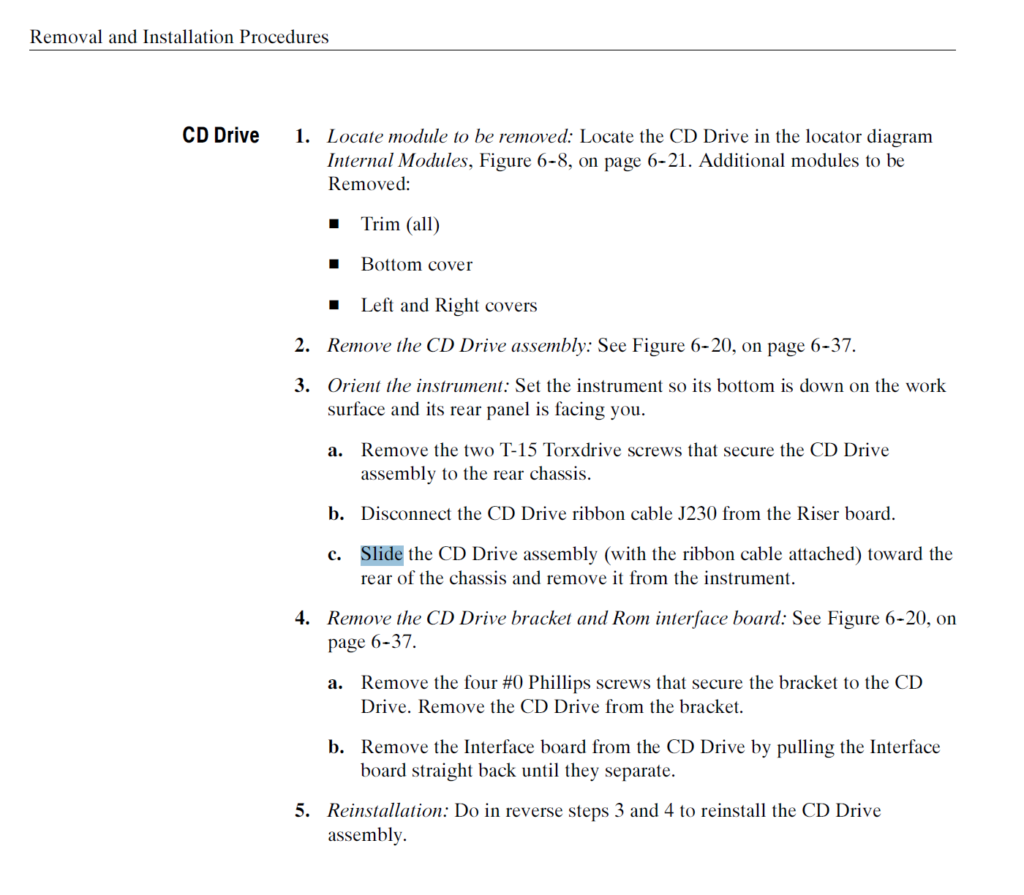
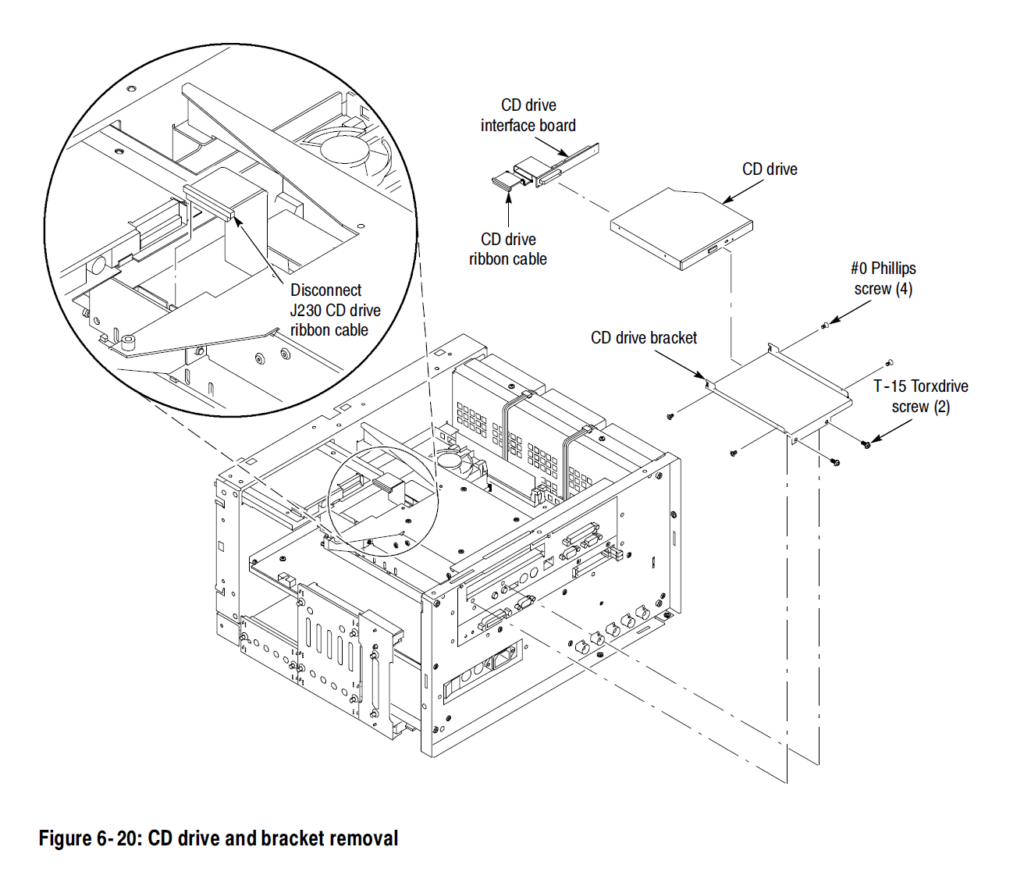
Figure 6–20 is just an exploded diagram, which covers everything taken apart without explaining the order and dependencies, which is essential because this damn thing was designed in a way that you wouldn’t have intuitively guessed the order by just looking at it.
Turns out after you removed all the screws that seemed relevant, the HDD+CD combo bracket won’t come out. I explained by in this annotated diagram:
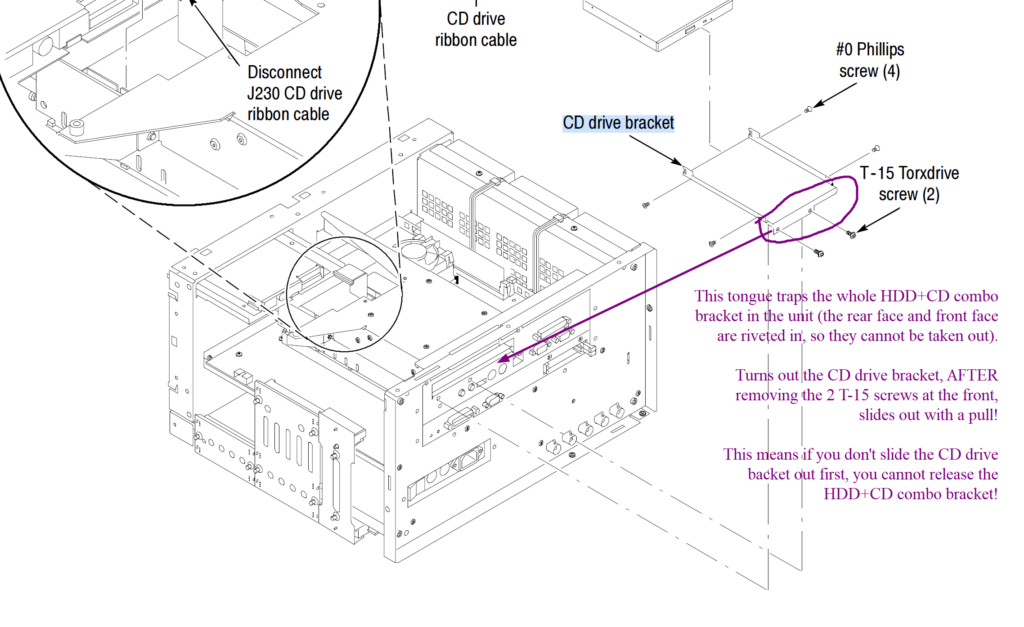
The manual is surely misleading because if you just need to take the HDD+CD combo bracket out, you don’t need to take out the four #0 Philips screws. This is something you can do after you pulled the CD drive bracket out, but first you have the remove the two T-15 at the front of the CD bracket, which made it look like it was the bracket of the HDD+CD bracket combo, so you wouldn’t suspect the whole thing hinges on you pulling the CD drive bracket out first.
Tektronix certainly doesn’t have good excuses for these lame design with lousy documentation. Even with cost savings in manufacturing materials, it just doesn’t justify the wasted labor. This is just taking shortcuts in design and it shows the lack of forethoughts and purely poor judgement.
This scope is lame everywhere. It really showed the people designed it either divided it into too many teams or they simply don’t give a shit. There’s no reasonable excuse for this other than laziness. The hard drive interface was converted twice! It takes an IDE drive, converts it to an SATA drive, then plugs into a board that converts the SATA to IDE back again just to fit the form factor.
Not to mention that the 44-pin to SATA adapter is a ribbon inside the caddy, which means it’s not carefully designed that you can slide the drive in. You have to pull the short cable out to plug it into the drive and push the bulk back in. It’s easy to mess the ribbon cables up with this design. It just screams the people who designed it hated their job.

![]()