Here’s the notes for moving from one namecheap hosting to another space yourself while keeping the same domain/settings.
Full backup on cPanel is a lie
A perfect full migration of shared host can only done by namecheap’s customer service. They told you in the doc that you can do a partial migration yourself but it’s not the full picture! Not only the self-service option is more tedious as you have to move the fragments instead processing one big archive file, there is a piece that’s not accessible from the self-service migration route: Calendars/Tasks/Contacts
This means if that ONLY IF you don’t use CardDAV/CalDAV at all, you can do the migration yourself.
cPanel has a FULL backup option, but says “You cannot restore full backups through your cPanel interface”, which means on namecheap’s staff can use this file to restore in one step, not the customers. However, at the time of writing, cPanel’s “Full Backup” feature is insidiously broken: it doesn’t produce a FULL backup at all! It’s just zipping the home folder into a .tar.gz file, nothing more. Database and calendar/tasks/contacts didn’t get backed up as they live outside the home folder!
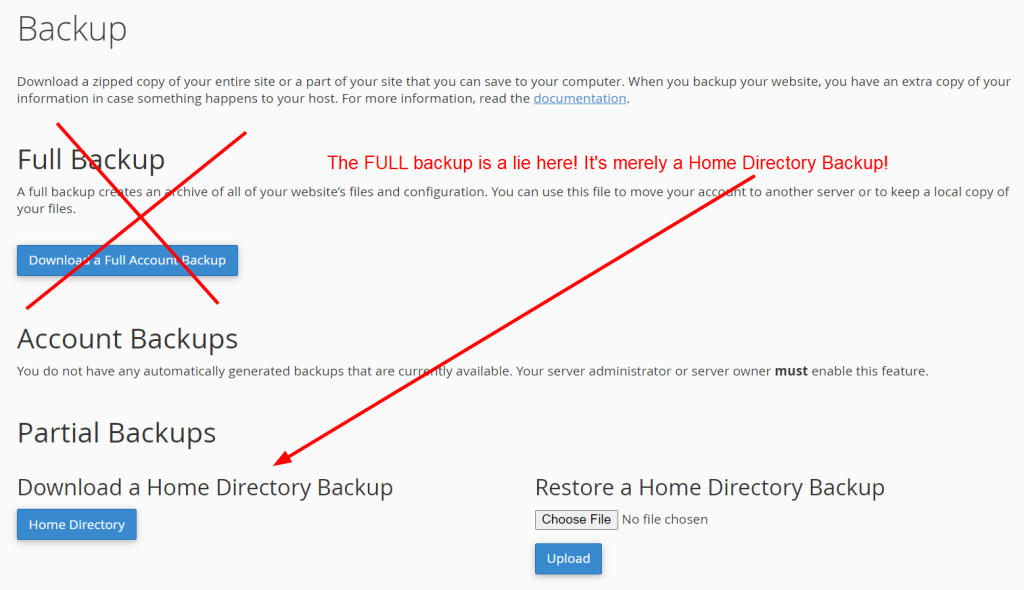
Just don’t touch the cPanel’s “Full Account Backup”. You are going to have wrong expectations and ended up losing data for good because the feature didn’t actually back all the pieces up.
Important conceptual facts
- cPanel and namecheap logins are totally different and separate things
- Hosting space cannot be left dangling. There must always be main domain associated with it
- SSL is tied to domain, not hosting.
- Fresh domain defaults to Namecheap Basic DNS, which requires manual DNS config entry to work.
- WordPress = Site folder + (MySQL) Database. Database password is hardcoded in
wp-config.php. - Emails are a bunch of files (moved around different folders depending on status)
- Namecheap hosting space doesn’t apply the group/owner names stored in tarballs
- Namecheap blindly kills anything that runs more than a few minutes (prevent resource hog)
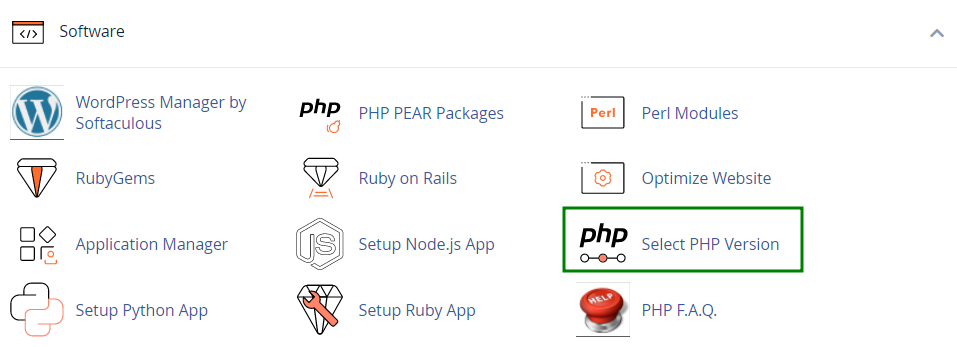
- New cPanel do addon domains and subdomains all in the “Domains” section
- Namecheap’s shared hosting is containerized with CageFS, which has a lot of unintuitive behavior, like Databases and Contacts/Tasks/Calendars are beyond user’s direct control.
- Use ‘Backup’ cPanel tool for the database tables and re-establish database users with “MySQL databases” section in cPanel. myPHPadmin is the unnecessarily more complex route.
cPanel login is per hosting space
cPanel and namecheap logins are different because cPanel manages your hosting space, so one cPanel login per hosting space you’ve rented. Namecheap is the high level account for everything.
Quirks from the concept of SHARED HOSTING (CageFS)
Shared hosting is not VPS. Basically they are making user accounts PER server software (HTTP server, Email Server, CalDAV/CardDAV Server, Database servers), not from a centralized source.
They use CageFS to containerize each user, but CageFS isn’t smart enough to mirror the files outside the user’s home folder through symbolic links when the user want to grab a copy.
This means if a server software package (such as Database and Cal/CardDAV servers) doesn’t normally place files in your home folder shared with your HTTP server, you have no raw file access and a lot of things are beyond your control.
These limited file permissions have non-intuitive consequences:
- cPanel user name is tied to databases, which is stored OUTSIDE your home directory
- Databases in Shared Hosting is stored outside your home directory. It can be manipulated by proxy only through cPanel tools. No direct raw file access
- CardDAV/CalDAV is also hosted outside user home folder. cPanel doesn’t even have tools to batch export it.
Need 2 extra domains
Namecheap’s hosting is always tied to a main domain name at any moment. There is not an option to let a hosting space dangle. This means you need 1 unused domain to hold the new space you’ve bought, and 1 unused domain to take the place of the domain you to free up for transferring to another hosting space. There’s no way around it. Can buy one of those cheap 98 cents TLD for a year just for the purpose.
cPanel login is per hosting space
cPanel and namecheap logins are different because domains are managed on namecheap. Only stuff that’s linked to the specific hosting space you bought is on cPanel. You can buy multiple hosting spaces and you will get different cPanel accounts.
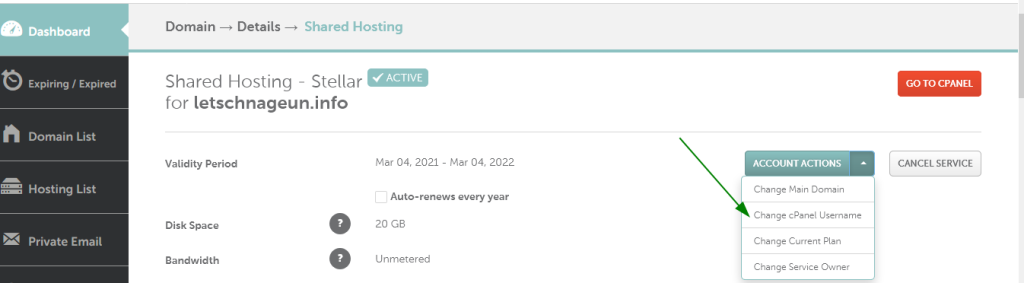
To avoid renaming the database links, you’ll need to keep the cPanel login ID after moving to the new hosting space. This is done by:
- backup the old hosting files before changing the cPanel login for the old hosting accounts (so the cPanel login ID won’t get changed by anything we don’t expect)
- rename the old hosting account’s cPanel login to something else (to free up the cPanel login name you want to transfer). It’s done through namecheap’s management interface, not cPanel itself.
- rename the new hosting account’s cPanel login to the one you wanted to transfer
New cPanel accounts are made with a randomly generated username and password. There’s a gateway through Namecheap’s UI to open cPanel without entering these password.
There’s an additional quirk that since you don’t know the initial password, you cannot change it without going through the reset password, and that reset password screen considers my heavy duty password as weak and my weak password as strong, then it failed with some unexplained error so I had to call Namecheap customer service to have them make up a password on their end so I can change it immediately.
cPanel login names are not subdivided
It might be tempting to think your hosting is a sub-creature of your domain so your domain name filters out all other namecheap customers and you can pick any cPanel user names you want like if you have a VPS (or your dedicated hosting computer), but it doesn’t work that way in Shared hosting.
Shared Hosting is conceptually is a pool of storage accounts (each with a cPanel user name). Requiring you to have a domain associated with it at any point is merely for namecheap’s ease of management and is not related to the conceptual organization of accounts.
This means your picking cPanel user accounts in Shared Hosting is like signing up for Gmail or Yahoo accounts, you are at the mercy of the names others haven’t picked.
Databases are stored differently from your home folder
Namecheap stores databases OUTSIDE (in directories that are at sibling/cousin level as your home). They do not partition their database into folders per user. You don’t manage/touch the raw database files in Shared Hosting. You can only do this indirectly (i.e. in a restrictive way) through the proxies in cPanel such as myPHPadmin or other database configuration tools.
The database in Namecheap shared hosting is one big engine. Namecheap partitions the YOUR database tables and the pool of YOUR database users from other customers by adding your cPanel name as THE prefix. You can’t opt out of this naming scheme. It’s how Namecheap tell you and other users apart.
Say if your cPanel name is “nezumi”, your database tables YOU control are all called “nezumi_(enter your name here)”, and all database user names YOU control are called “nezumi_(enter your name here)”. These names can overlap and often overlap if you make one user per database table.
Calendar / Tasks / Contacts are stored outside your home folder
Like databases, CalDAV (calendar + tasks) and CardDAV (contacts) are not at your home folder in shared hosting. You don’t have access to the raw files either.
Even worse, there are NO TOOLS ON CPANEL to batch back it up. The only way for users to back it up on their end is to fire up their CardDAV+CalDAV clients software and export it then re-import it, account by account!
After I dozen of chats with namecheap support, finally one really knew his stuff and let me know I’m stuck with a FULL migration manually done by namecheap support operators if you want the calendars/tasks/contacts batch migrated.
Email accounts show up when you link the relevant domains
Emails are stored as folders, along with their config info. Contents of the folder already in place will show up automatically and configured correctly once you added the domain to hosting through cPanel. No need to manually add accounts or do anything.
If you have email filter/redirections, these can be backed up and restored through the “Backup” section. You cannot restore these until you added the domain to the hosting first though.
Backing up site folder (Home Directory Backup)
Restoring Home Directory Backup from the same interface is crazily slow. So you might want to FTP the archive/tarball up there and extract it on server side.
However, I noticed that it backed up an unwanted “..cagefs\tmp\” (temporary) folder which contains symbolic links outside the home folder (it points to the public shared database which we don’t have raw access). Since we don’t have permissions, this choked the extractor. I used 7-zip to delete this offending folder before uploading so the extraction succeeded

WordPress
WordPress has 3 elements to it: folder, database and PHP.
Folder is easy.
Database is the painful part. Since it’s not stored in your home folder, you need to re-establish the database accounts, backup/restore the database content file.
You can back up and restore the database tables through “Backup” section in cPanel. Make sure you backup BEFORE changing the cPanel name
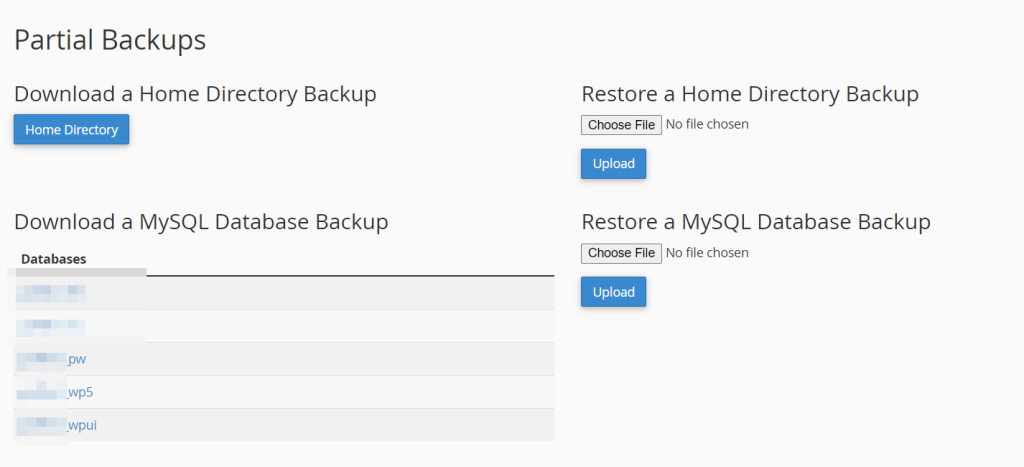
Then head to “MySQL® Databases” section to add database users mirroring the same thing as the old hosting space. Remember to add the user AFTER you got the cPanel username transferred to your new hosting space.
Basically wordpress hard-codes the DATABASE password to the database made for it in wp-config.php, so when you generate the user account associated with “(cPanel username)_wp5” table, you have to make sure set with the same password as ‘DB_PASSWORD’ defined in wp-config.php:
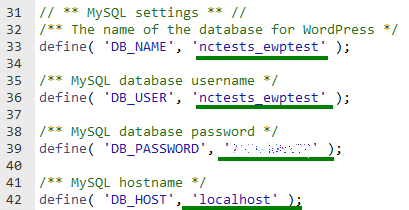
I don’t know about the pw and wpui table’s password yet. Will update this blog post if I discover something breaks if I didn’t set it to use the same password.
Not done yet. You just created a bunch of user accounts studs. They need to be assigned (added) to the database tables. When you assign users to tables, it will prompt you for permission. Just select all and enable all rights.
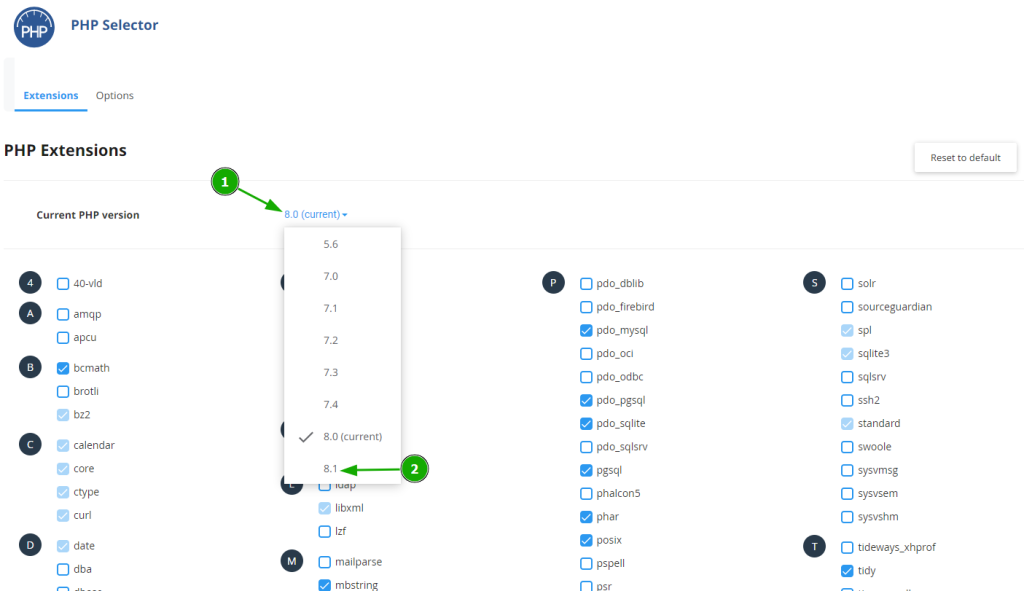
The new hosting space might default to newer PHP version and libraries that will break your old site. Remember to transfer the same PHP version setting through cPanel
SSL works right out of the box (no changes)
SSL is tied to domain, not hosting. Nothing needs to be done if you are just moving storage/hosting space while keeping the domain configs the same
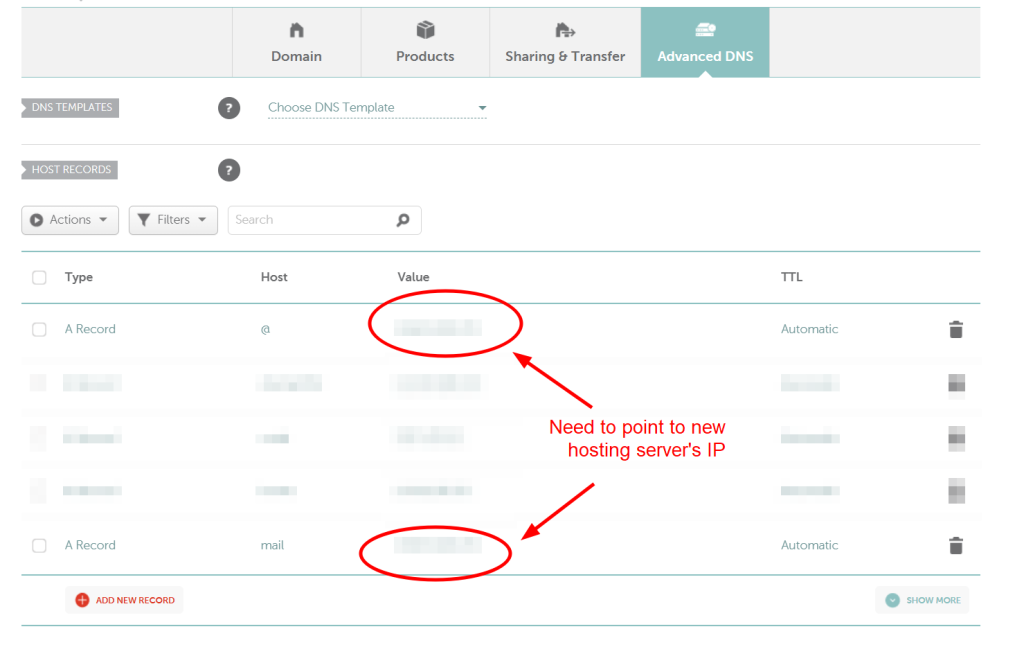
Change the nameserver to the old hosting space after linking it with the dummy domain.
The dummy domain name you used to hold the old hosting space needs to have the Nameserver pointed to “Namecheap Web Hosting DNS”. The default “Namecheap Basic DNS” requires you to manually configure the DNS records (like A, CNAME, etc) in the Advanced DNS tab and by default it isn’t configured correctly. “Namecheap Basic DNS” is only needed if you try to use Dynamic DNS and host files (through subdomains) under the same root domain name.
Namecheap blindly kills anything that runs more than a few minutes
When I download a big file, the FTP/SCP keeps getting reset and I have to manually restart/resume it. Do not use tarball commands with SSH if your file is too big and would take too long to extract. Use the FileManager on cPanel and right click to extract the tarball (not time restricted through this interface).
Tarball notes
Tarball is just a bunch of files stitched together, the .gz is the archive part. Since the server has limited CPU resources, when you upload to the new hosting plan, consider extracting the .gz part on your PC before uploading if the compression ratio isn’t great anyway.
Extracting out the .gz level does not change the folder structure of the tarball. Actually the cPanel generated tarball starts with an explicit “./” folder (which is ‘self’) so if you place it at your home folder and extract it, the folders will be extracted at the right level without going one layer deeper than needed.
Also don’t need to muck with chown/chmod. This just works right out of the box.
If the site folders are the large chunk of the tarball, take it out and upload the extracted files at your own pace later. You want to get the small files with complex structures like email and settings up first.
Transferring Addon domains
If your add-on domain uses Custom/Namecheap Basic hosting DNS instead of Namecheap Web DNS, your DNS entries are not managed by Zone Editor in cPanel but in Advanced DNS tab in Namecheap’s interface. This means the addon domain is still clinging to the A records that points to your old hosting server.
![]()